Category Archives: Shawls

Vintage Table Runner

Vintage Table Runner

Crochet Chronicles: 

My elderly Parents live with my sister or she lives with them….depending on how you wish to see it…:-) . Both of them are in their 80s and are active both mentally and physically. Though my Father suffers from Parkinsons ( He still hasn’t reached that stage where he needs help)…he is always positive and a wall of strength to all of us. My Mother holds our home together….and is such a superlative cook…that we look so forward to meal times. Now she has taught the lady who helps out at home, Vrindha all her culinary tricks so that even when she does become incapacitated…her darling grandsons will still get those scrumptious delights. Parents….What are we without them? Who will love us, care for us, worry about us and be there for us like them? As my Parents grow older and more feeble…..I feel this sense of fear and despair at facing a future without them.

But enough of such dark and despairing thoughts…The reason I wrote about my Parents is because, this particular runner was made at my Mother’s insistence. My sister bought a new dining table and a chest of drawers to go with it…and all my Mom’s old and beautiful collection of laces wouldn’t do for this. So My scrupulous Mom…who has exceedingly very high standards on what goes on her furniture rang me up and told me that she wanted me to make her a table runner.

I was so thrilled! I never thought that my work would ever be good enough for her….I know she loves pastels and white….so I made this one in shades of ice pink, peach, lolly pop pink and white, mint green, light yellow and white. Though the original pattern is all in white…I thought this made an interesting  picture. What do you think?


Materials Used:

Anchor cotton #20 in pastel shades and white. I used 5 balls of white and 10 gms and a little less of each of the other colors.

Hook 0.75mm I normally use 0.9mm to 1.25mm with #20 thread…but decided to experiment with a much smaller hook. I like the lacy effect, though hooking is hard on the hand.

Pattern:

Since this is a vintage pattern, there is no graph as such…but there is a written pattern at this link, below:

http://freevintagecrochet.com/doilies/7717-doily-pattern.html

And as Always…here is the photo tutorial….

Runner measures about 14 x 38½ inches.

Each motif measures about 3½ inches in diameter.

FIRST MOTIF

Starting at center, ch 6. Join with sl st to form ring.

13081727_552952411558805_970560264_n


1st rnd: Ch 1, work 12 sc in ring. Join with sl st in 1st sc.


13101154_552957344891645_931585906_n


2nd rnd: Ch 5 (to count as 1 dc and ch 2), * dc in next sc, ch 2. Repeat from * around, joining last ch-2 with sl st in 3rd st of starting ch-5 (12 sps).


13077380_552957348224978_1531402859_n 13084273_552957334891646_2051752738_n

3rd rnd: Ch 3, 2 dc in same place as sl st, * ch 3, sc in next dc, ch 3, 3 dc in next dc. Repeat from * around. Join.

13081859_552957354891644_962207236_n


4th rnd: Ch 3, dc in same place as sl st, * dc in next dc, 2 dc in next dc, ch 4, sc in next sc, ch 4, 2 dc in next dc. Repeat from * around. Join.


13115770_552958191558227_1403379450_n

13081846_552958208224892_513314797_n 13115327_552958198224893_154325539_n

5th rnd: Ch 3, dc in same place as 3 ch, *dc in next dc, 2dc in next dc,  ch 3, skip 3 ch, sc in next sc, ch 3, 2 dc  in next dc. Repeat from * around, ending with ch 3, tr in 1st sc.

13101489_552958391558207_1700455324_n

13101484_552958384891541_773313651_n

13077136_552958401558206_122171011_n


Here I have changed the pattern from the original a little…

6th rnd: sc in same stitch as ss, Ch 7,  sc in top of tr just made, * ch 10, 1 sc in center st of next ch-7. Repeat from * around. Join.

13100990_552958534891526_1052217529_n

13084238_552958528224860_1113785931_n

13115510_552958604891519_1802798652_n

7th rnd: Sl st in next 2 dc, * in next loop make (4 sc, ch 4) 3 times and 4 sc. Repeat from * around. Join and break off.


13115510_552958604891519_1802798652_n-2


SECOND MOTIF … Work same as for First Motif until 6th rnd is com­pleted.


7th rnd: Sl st in next 2 dc, * in next loop make 4 sc, ch 4 and 4 sc; ch 2, sl st in corresponding ch-4 loop on First Motif, ch 2, in same loop on Second Motif make 4 sc, ch 4 and 4 sc. Repeat from * once more. Complete rnd with no more joinings.


13115510_552958604891519_1802798652_n

Make 4 x 11 motifs, joining them as First Motif was joined to Second Mo­tif and leaving one large loop free be­tween joinings.


13084234_552958541558192_274889797_n


13081833_552958748224838_1327630115_n-2


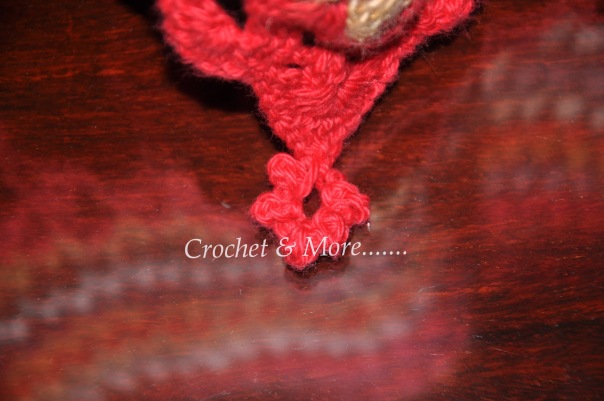
Unfortunately..I was travelling while the next part was being hooked and the pics just didn’t come out right…..However the written pattern below will def help..

FILL-IN-MOTIF … Attach thread in center ch-4 loop of any large loop between joinings.

1st rnd: Ch 3, 2 dc where thread was attached, * ch 5, 3 dc in center ch-4 loop of next large loop. Repeat from * 2 more times; ch 5, sl st in 3rd st of starting ch-3.

2nd rnd: In next ch-5 loop make 4 sc, ch 5 and 4 sc, * 4 sc in next loop, ch 2, sl st in last ch-5 loop, ch 2, 4 sc in same loop as last 4 sc. Repeat from * around. Join and break off. Press through damp cloth. Starch lightly and press.

 13090047_552958864891493_1337790906_n

Crochet Rose

Crochet Rose


13228100_557531977767515_1112957910_n

Crochet Chronicles:

Aren’t roses beautiful? I have yet to meet a person who doesn’t love this glorious genre of flowers. And this is seen in the profusion of patterns created and posted by so many talented crocheters . So today I thought let me make a little rose to go with the hairband that I posted here last week.  This pattern is a very simple one and a very popular one as well….

Materials Used:

Red Rose Thread #10

Hook : 1.5 mm

Tapestry needle

Method:

Depending on how big and how many layers you want your rose to be…Hook in chains in multiples of 3….each 3 chains represents a petal. I am making a little rose to fit in with the hair band that I made.

Hook in 39 chains plus 3. Total 42 chains.

Row 1:

3 ch, skip 3 chains and dc in 4th chain; *3ch, skip 3chains and dc in 4th chain*….continue ** until the end. what you get is a pattern like a ladder…….with 3 chain loops.


Row 2:

Now we create the petal on top  of first row.

chain up, sc,hdc, 6 dcs, hdc,sc in the first 3 chain loop created.  hook in *sc,hdc, 6 dcs, hdc,sc*  in the next 3 chain loop and continue until the end.13187647_557521214435258_794491675_n

13219972_557520837768629_240610930_n

Now, slowly roll the petals using the ladder part as the stem. Make sure that when you roll the petals around each other it forms not the shape of a rose. Use a tapestry needle to sew the stem and the inner petals in place so that it stays together.

13162127_557520844435295_704699376_n

And voila…You have a lovely little rose…:-)

13228100_557531977767515_1112957910_n

Here are some graphs to make roses uses different combinations of stitches in almost the same way.

crochet flower 46 crochet-flower-patterns-diagrams-craft-craft-6tsvetyi-kryuchkom-6-288x30073eeac1379aba76768baa0da84259d9a-2

Just to practice do try to make some of the other roses as well…..Enjoy yourselves..and above all ..Keep that smile on..Love and Hugs…:-)

Crochet Poncho

Crochet Poncho

DSC_9734

Crochet Chronicles:

Last winter I saw many of my friends making Ponchos and I really wanted to make one …but couldn’t….  I got something called Thoracic Outlet Syndrome, which my doctors mis-diagnosed ( not that they can be blamed) because the symptoms are all that of a heart attack. My Cardiologist panicked and put me through an angioplasty and then I panicked…:-D!!

Anyway, all in all I didn’t crochet much…….so the Poncho dream was left unfulfilled..:-) But in May…I got this super soft Nako Yarn in awesome autumn tones…..so….I made this Poncho.

Materials

Yarn: 300 grammes  of Nako Vals

main_vals_tituls

Hook: 3 mm

Abbreviation

sc – single crochet

ss – slip stitch

dc – double crochet

ch – chain

sk – skip


Pattern


poncho-2

Round 1.

Make a chain of 64 stitches ss into the first chain. ( After I finished work on the Poncho I worked a round of dcs around the chain at the neck in ochre….Just to give it a zing cos I made the edging in Red..)

Round 2.

DSC_9740

3 chain up, 2  dcs in next 2 chains; *1 chain, skip on chain; 3 dcs in next  3 chains; 1 ch, skip 1 ch* ** until you reach the first  3 chain stitch.  Then ss.

Round 3:

DSC_9742

It is here that you start to work on the ‘V’ shape in front and behind the neck

3 chain up, and 3 dc in i ch space;  1 ch, skip  3 dc; *3dc in 1 ch space;  1 ch, skip 3 dc;*;  ** (2).

3 dc, 1 ch, 3dc in the next 1 ch space;  1 ch, skip 3 dc; **(7)

3 dc, 1 ch, 3dc in the next 1 ch space; 1 ch, skip 3 dc; **(2)

DSC_9735The thing about this Poncho pattern, is that you can make this as big and as small as you like.

DSC_9741
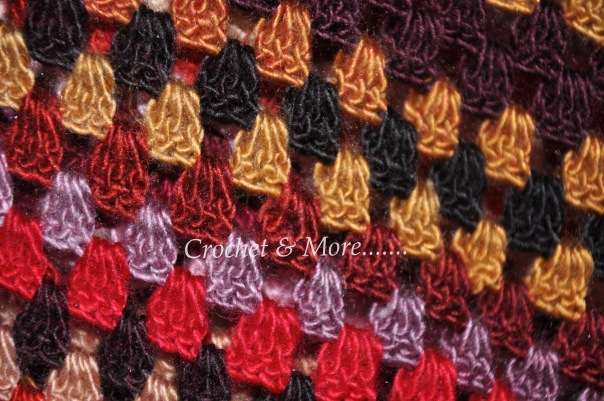
Round 4 – to the size you wish.( I did )

Edging DSC_9737 DSC_9738


I used a new color, here in red,  cotton yarn( mainly cos I couldn’t get the red that I wanted in acrylic…but since the gauge worked out to be the same and the cotton had a nice matt look to it..it worked out well.

Pattern:

Round 1

Chain 3 up in 1 ch loop, 6 dc in same loop; Skip the 3dc of the previous round; 1 sc in next 1 ch loop; * Skip 3 dc of precious round, 7dc in next loop; Skip 3 dc of previous round, 1sc in next loop* ;   ** until end of round, ss.

Round 2:

ss in the next dc, then 3 chain up and 2 dc in next 2 dcs; 5 chain, skip the rest of the 2 dc  and the 1sc; 1 dc in the third dc of the next 7 dc cluster, 2 dcs in the next 2 dcs;

* 5 chain, skip the rest of the 2 dc and the 1sc; 1 dc in the third dc of the next 7 dc cluster, 2 dcs in the next 2 dcs;* continue ** until you reach a corner, at each side of the corner 7 dc cluster , hook in 7 chs instead of 5 chs…continue ** until all 4 corners and round is done; ss.

Round 3:

ss, chain 1 up, sc in next dc; 9 ch;5 dc in next 5 ch loop;1 sc in the second dc of the 3 dcs of the previous round;

ss,* sc in the 2nd dc; 3 ch,  2 dc in the 3rd ch of 5 ch loop, 5 ch picot, dc in the 3 same ch as the other 2 dcs, 3 ch; sc in the 2nd dc; 6 dc in 3rd ch of 5 chain loop; sc in the 2nd dc*; ** all around; ss.

Round 4:

(How to make a 5 ring picot..

DSC_97394 ch, ss in the 3rd chain form the hook -* 4  ch , ss in the 3rd chain form the hook*; **3 times…once you get  all the 5 picots in place, 1 chain and ss in the first chain the beginning of the 5 ring picot.)

sc on sc; *4 chs , sc in the 5 dc, 4 ch picot,  4 chs;  sc on sc ;  7 dc, 5 ring picot, 6 dc;  sc on sc; 4 chs ,sc in the 5 dc, ch picot, 4 chs *;  ** until the end of the round, ss.

And there you r……a beautiful Poncho….simple, elegant and classy!

DSC_9734


Evening Glory – A Beaded Scarf

Evening Glory – A Beaded Scarf

 DSC_8900

Crochet Chronicles

I went shopping in Mangalore with my crochet buddy Viraja and bought this lovely mustard Kurti/Tunic top. It was pretty on it’s own but needed something to sass it up….thus began my voyage into another bout of pattern hunting…..then I came across a a post by another crochet buddy Meena Krishnamurthy who had used this variation of the ripple stitch to create a lovely Afghan…..And while she had done hers in different colours I wanted a black…a jazzed up black….so I used bronze shaded seed beads to create a totally different effect.

DSC_8897

Materials used:

DMC #30 – 100 gms( 2 balls)

Seed beads of your preference…( the amount depends on the amt of beads you wish to add) – Approx 150 gms

Hook – 0 .9mm

Abbreviations Used:

ss- slip stitich

sc – single crochet

sk – skip

dc – double crochet

ch – chain

tr – treble crochet

Crochet Chart: 

( courtesy the internet, and shared by Meena Krishnamurthy)

10492208_684733284943186_1628157959829564795_n

Method

Think of how wide and long you wish the scarf to be. Then calculate the number of chains you will have to make for the required width plus 3 ch( the last part takes the work up to the next row.)

This one is calculated by multiples of 10 plus 1. because at every 11th stitch the ripple effect is created in the 2nd row

First decide where you want the beads to be in the pattern. Then calculate the amt of beads that you will need. String in the beads. Sometimes you may find it difficult to string in all the beads in one go and that is alright. String in as much as you can and then when you have done in the beads on the thread and but still need to add a few more, just cut the thread and stitch it in. String in all the beads that you need and then ss and continue.

Written Pattern

Row 1:

Chain in 131 plus 1…altogether 132; then sc in 131 chains.

Row 2:

^(Chain 3, *skip 1 sc, dc in next sc, 1 ch*,repeat ** 4 times; 2 chain, dc in same sc as previous dc( making a ‘V’ shape); Since a ripple effect in crochet s caused by peaks and dips……This causes the pattern to lift to  peak…..and the next set of stitches will cause the dip.

*sk sc, 1 ch,  dc in next sc*, repeat ** 3 times, sk 3 chs, dc in next sc)^

Repeat ^^ until the end of the row…….end with a dc.

I crocheted in the beads, here as I did this row…2 beads per stitch.

Row 3:

3 ch up, sk one ch, a dc  each in next the  8 stitches, 3 ch, dc in the same stitch as previous dc…..making a ‘V’….A peak

*7 dcs in each of the next 7 stitches, sk 1 ch, 2dc and 1ch; dc in each of the next 7 stitches;…….a dip……..3 ch, dc in the same stitch as previous dc…..making a ‘V’*.

Repeat ** until the end of the row….end with a dc.

Row 4:

3 ch up, sk 2 dcs; (dc in the next dc, ch 1) x 3; *sk one chain, one dc in the next chain, 3 ch one dc in the same chain as previous dc…A peak

sk one ch, ch 1, (dc in next dc,ch 1) x 3; sk 4 dc; dc in next dc, ………Dip………(skip one ch, 1 ch) x 3; *

Repeat **until the end of the row end with dc

Row 5:

Chain up 4, sk one ch, ch 1, treble in next dc; ch 1, sk 1 ch, treble in next stitch; ch 1 , sk 1 dc, dc in dc, sk 1 ch , ch 1, dc in dc;

Repeat Rows 1 to 5 until you get the required length.

Edging

Here’s a pic tutorial on how to make a curly tassel.

http://www.crochetspot.com/how-to-crochet-curly-fringe/

And here’s the video tutorial….

DSC_8907

How to Crochet A Square

HOW TO CROCHET A SQUARE

DSC_8887

Granny Squares …….one of crochet’s most loved and much worked on motif. There are zillions of patterns out there. The happy part about a GSq ( granny square) is that you can make it as easy or as complicated as you like. If you are in the mood for a challenge…..there are patterns that will give you a run for your money. On the other hand, if it’s comfort hooking that you are looking for….there are such naive and innocent patterns as the one below.

Versatility….thy name is GSq….or so the legend goes……:-) Jokes apart…you can make almost anything with GSqs. Garments – jackets, sweaters, boleros, vests, baby dresses,shorts, pants anything really. You can make accessories like belts, shoes, bags, jewellery, etc.. You can yarn bomb your home with GSqs in the form of Rugs, bedspreads, Afghans, Blankets, lamp shades, baskets, boxes table covers, Runners, anything and everything……the list of the things you can make with this motif is endless.

One of the simplest GSqs to make is the pattern below. I call it the ‘ Abracadabra Square’ and  made the tutorial to help interested ppl, read a simple crochet chart…..

Here is a photo tutorial link to make this Granny Square:

http:/https://crochetnmore.wordpress.com/2014/08/11/how-to-read-a-crochet-pattern-1/

DSC_8264

Here are a few things you can make with this simple pattern….All the charts and patterns are from the internet

10425126_10202848817913759_6367759349687018313_n

Some Ideas on how to use GSqs…

cf31c840bb928870caf28f194dc9801f ffd798dce7f7c12c40a14f9bfc6d0c23 e73c6b1ec6529147f953f4e42c09bdd9 699eac13fc84b4fc59e29d0f9a68f147 79d02cb35281f29d0572ce8cffe4e41f 3b8237be21ecc5b40daf2a1d4b859f3f aea807d46fa2549ed37615401267589c 68a53b15ab446b77c7c2af1f3f910516 3e0043baa021af26e40259dc0fa6a79f1e526b339f918f9e4eae6d81db9717d9 19af3978e5704d173e2380de7a9d989d 550dcdf2b2a0484cbabfb5bd18779abeb5e5cf4a623089ffc2babc40da37add0

HOW TO JOIN GRANNY SQUARES

http://www.knotyournanascrochet.com/2013/04/10-different-ways-to-join-granny-squares.html

This is a Granny Square Vest I did….For the tutorial just follow the link below:

DSC_8172

https://crochetnmore.wordpress.com/wp-admin/post.php?post=904&action=edit

This GSq..is a closed pattern …very useful for Afghans and blankets….anything that you want to make which will keep the heat in.

10291060_1529057230666712_3943228637030649147_n

Some more patterns from the Internet:

 BAGS :

1979564_1535965373309231_3776473828841805207_n

10462561_10202848819713804_3114270291370458434_n


GSq Afghans:


7dbc04bebedc95823138e1501849c212                 a8be7003c96637e86e1fbcf7f20025455cbea04f97e9e4854deaef86244a5816


A Granny Square Scarf

10672423_1532257590346676_2709225902476145725_n

Some Motif Patterns:

7a11c7badd05a6eae743a786ee0a154c                      efcfd849ec9016a4c8294a51207f861a4cfd2ae3d0ba6dc390ef5d76515d72b8560215_1532254410346994_4855094413932978197_n


Links to GSq Pattterns:

Pattern for a Rose Afghan/Blanket/Bedspread:

http://cypresstextiles.net/2014/06/03/rose-granny-square-free-pattern/

Mini Basket:

http://www.thislittlestreet.com/blog/2014/06/19/diy-mini-granny-square-crochet-baskets-guest-post-by-victoria-from-vika-moka/#_a5y_p=1857907

Cushion Covers:

The link below does not give you the pattern but this blogger has worked up a beautiful sunburst GSq into a cushion cover….I just love her use of colours. The link to the GSq is given in the second link…use the 2nd link to make a lovely cushion cover made in the first link….does that sound complicated…:-(

http://dada4you.blogspot.ae/2013/12/daisy-granny-square-pillow.html

The link to the Granny Square..Sun Burst…..

http://purplechaircrochet.blogspot.ae/2012/08/sunburst-granny-square-free.html

The below link is in German…but the motif is the same as for the cushion above….so not so hard to work it out….

http://petitefee-kinderaccessoires.blogspot.nl/2013/01/haakpatroon-granny-square.html

GSq Shoe:

http://www.favecrafts.com/Crochet/Multi-Color-Granny-Slippers-from-Bernat

http://ortsov.com/granny-square-crochet-slippers/

Owl Baby Blanket:

http://www.repeatcrafterme.com/2012/11/owl-granny-square-crochet-pattern.html


This is a GSq BedSpread that I did around 4 years ago…it starts out as a circle and then you work in the corners to abracadabra it into a square…..Magical!!!! Unfortunately…copyright restrictions prevent me form sharing the pattern with you here…

 17608_221557437982189_1863180834_n

So There You Are……Feeling Energised…….The magic in You already??? Of course it is…..don’t waste a minute …..get that yarn out and let’s go Bibbetty Bobbetty Boo….Swinging that Magical Hook All The Way…..:-D!!!

Diamond Lattice Scarf

DIAMOND LATTICE SCARF

DSC_8823

Crochet Chronicles:

My sister, who rarely ask me for anything, was going through my FB page Crochet & More and fell in love with the Irish crochet scarf that I had done.. She wanted one of those…..but I had just finished hooking up 3 of them and was a little bored with doing the same thing. So I hooked her this scarf……and guess what?…. she loved it!!!!

This is a very gentle and innocent stitch pretending to be glamorous and sophisticated….and if you are wondering what I mean by that is……though the stitch looks complicated it is very simple to do and is addictive.

Materials used:

Pearl cottton #5 from Soft Feather 150 gms

Omega cotton Thread from Coats #10 – 100 gms.

Anchor cotton #20  – 20 gms for the tassels

Abbreviations used:

Slip stich – ss

Single Crochet – sc

Double Crochet – dc

Skip – sk

This is the chart that I worked from: This pattern is from the internet. I did do my own thing, in that, I hooked in a mesh stitch on either side of the scarf.

94ec7285288443b2af9cb66a586b3dca

Written Pattern:

As mentioned before, I have used 3 kinds of thread…pearl #5, #10 and #20……it adds to the texture of the finished product…

I first worked with #5…which is a very light thread, building in the middle portion of the scarf…..then I worked #10 on both sides…#10 is not as soft as #5…so it weighs a little on both sides and then when you add the #20 as tassels…the whole project holds the length and shape…There is no need to starch this scarf.

Row1:  For this scarf I hooked in 16×6 = 96 + 8 +8 chains. then 3 chain up

Row 2: 3 dc in same chain as the 3ch up ;* skip 7 ch; 3dc in next  ch; 3ch; 3dc in same ch;* continue with ** until you reach the last  8 chs…. then skip 7 chs  and  4dc in  the last chain

Row 3:  3ch up, 3dc in the same chain; *5 chain, 3dc in  the 3ch loop created by the two 3dc cluster in the first row.; 3chain; 3dc in the same loop*. continue  ** until end of row.

Row 4:  3ch up , 3dc in same chain; *3chain; 1 sc is made gathering the 7 ch of the first and second rows: then 3ch; 3dc in the previous row’s loop 3ch 3dc* continue until end of row.

Now you have created your first diamond Lattice.

DSC_8815

I made 34 rows of diamond Lattice in Pearl #5 then switched to #10 for 10 rows. Cut the yarn, and attached it to the other end of the scarf where I had first begun. So now you are hooking into #5 thread with #10 thread. What you get is a thicker and softer middle portion (the part that goes around your neck.)..and both the ends of the scarf are daintier becos you have hooked it with a #10. I also wanted the zigzag design as the border….I thought it looked more interesting.

I made 54 rows of Diamond Lattices.

DSC_8827

You don’t have to use 3 different types of yarn ….you can make it with the same yarn all over…I just like to play around with textures…:-)

To give the  2 long sides of the scarf a lacy feel I crocheted a mesh stitch along the sides using  Omega from Coats #10 thread.

For the mesh stitch….dc 3ch  dc

Tassels:

I made the tassels with Anchor #20……just t wanted it to look more daintier and delicate…..Here is a very good link that shows you how to make tassels….

http://hubpages.com/hub/Knitting-Hints-How-to-Make-and-Attach-Fringe-Tassels-to-a-Scarf-Shawl-or-Sweater

Well…here we are at and that’s how simple this scarf was to make……Enjoy…and Keep that beautiful smile on always….