Category Archives: Yarn/Hooks/Crochet Symbols

Crochet Pyramid Bag


Crochet Pyramid Bag

Introducing… The Pyramid Bag.. a long time Ago, I was thinking of making 3 triangular pouches from a pattern on the internet.. This was made by joining 2 Triangle crochet pieces together.. though I made 6 pieces .. 2 in each colour combo.. I got interested in other projects and this became another basket WIP….

Yesterday I pulled them out and made one simple traingular pouch.. but wanted to do something different with the rest.. so Lo behold … The Pyramid bag.. got 4 triangular pieces( I made 2 more for this one in the same combination) used old plastic table mats inside the lining of the bag to give shape and definition.. fixed a zipper, a wooden beaded handle and a base with wooden beads. When I posted ths in my group…..the response was tremendous….Some of the lovely gals there wanted me to create a CAL and share how I lined the bag to give it shape…

Though I am not going to make this purse again…I thought..I will write and by a small pic tutorial show how I did the lining..  .

Size Of the bag: 

Is 16 cms in height and as this is an equilateral Triangle the width is 16cms.

Material Used:

Yarn:

Nature’s Cotton Yarn from Soft Feather

Hook Size:

3:00mm

Lining:

A plastic table mat , or thick canvas, or any material that is flexible, you can cut into shape..may be used beneath the lining.

Lining material approx half a metre…

Method:

Make 4 equilateral triangles ..that is 4 triangles where the 3 sides are of the same length. All the 4 triangle should be of the same size and shape( I say shape becos sometimes in corchet we have triangle patterns where the 3 points may be rounded). Whichever pattern you use…for the triangles….make sure the size used is the same for all 4.

Pattern:

I have written out the first 2 rounds for those who may find it difficult….

Pattern for a triangle

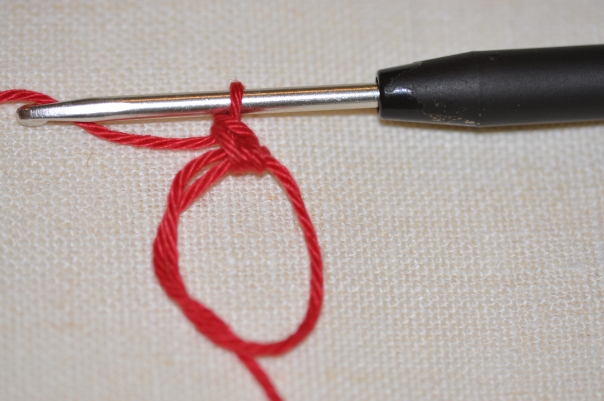
Make a magic circle

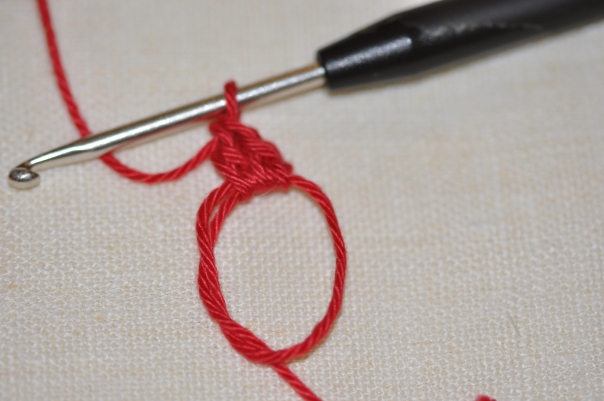
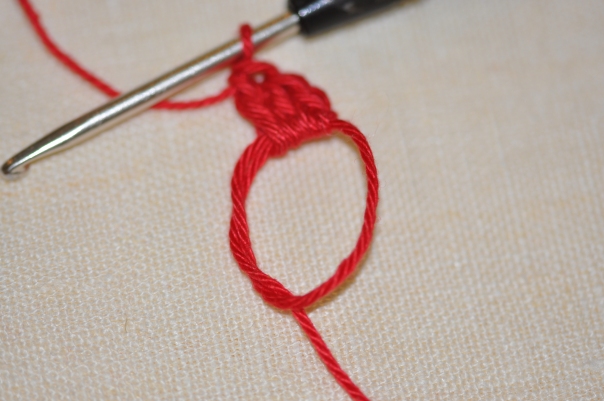
Round 1: Into the magic circle .. hook in 3 ch, 2dc; 2ch; 6dc; 2ch; 6dc; 2ch; 3dc; ss

Round 2:
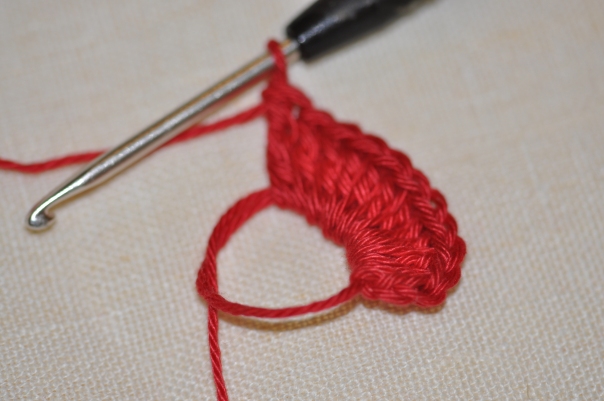
3ch up, 4dc; 2ch; 10dc; 2ch; 10ch; 2ch; 5dc; ss

For those who find it difficult to read a crochet graph pls do check this link….

https://crochetnmore.wordpress.com/2014/08/11/how-to-read-a-crochet-pattern-1/


 Lining:

After you hook in the 4 crochet triangles….you can accessorise it with beads/ribbons/tassels, sequences  etc…or you can wait until all the pieces have been joined.

Cut out 4 triangles out of the plastic mat at a slightly smaller size than the triangles.

(The pic below is just an example and not in original size)

Then placing the lining material in front of you fold it into half(making sure the ‘right’ sides are facing each other)…place the plastic triangle on top of the material and then using a cloth marker pen or a pencil or fabric chalk….mark out  an outline around the triangle.This first outline is the size we require…this is the outline we will stitch on. So let us call it outline A

Then measure half an inch from that outline and mark out an outline around the triangle half an inch away from the original outline. This second and most external outline is the one we will cut …so that now you have an excess of half an inch around the original triangle. We will call this B

Now cut along B and seperate this piece from the main material…you will now have 2 triangular fabric pieces of the same size.

(The pic below is just an example and not in original size)

Now stitch along 2 sides of outline A….keeping 2 triangle pieces together.

Then pull the triangle inside out…This is make the stitched part go inside and then place the plastic triangle inside and inbetween the triangular envelope that you have just created.

Then sew in the 3rd side and close it up.

Repeat with the other 3 triangles.

Now place each of fabric lined triangles on each of the crochet triangles and stitch it on to them. Thus you now have 4 lined crochet triangles.

Alternately you can also join all the 4 lined triangles to create a bag…Join all the crochet triangles seperately to create another bag. Then place the lined triangle bag inside the crochet triangle bag and sew the lined bag onto the crochet bag.

Joining the Triangles to form a Pyramid

 Join all the four lined triangles by placing one triangle in the centre, and the other 3 facing each of the centre triangle’s sides. So that each side of the centre triangle should be aligned with that of each of the other triangles.

(The pic below is just an example and not in original size) 

Join the sides of the triangle using single crochet(sc) but make sure that you leave one side  unjoined. On this side you have 2 lips…….do half double crochet(hdc) along both the lips. This is your bag’s opening…..where you fix your zip.

 Join the sides of the triangle using single crochet(sc) but make sure that you leave one side  unjoined. On this side you have 2 lips…….do half double crochet(hdc) along both the lips. This is your bag’s opening…..where you fix your zip.

Sew the zip by first fixing both ends by pins to the lip opening corners of the purse. Once it is fixed….sew in the zip to the lip around the opening. Cut away the excess length of the zip.

You can see the zip below….

Below is how the bag looks from the top…an aerial view…. You can make any type of handle or get a ready made one….I made a handle out of wodden beads…..and then used smaller wooden beads around the base of the bag.


And there you go…..One lovely Pyramid Bag….You can really play with this…use a thinner thread and create a lacey effect…..ofcourse you will make to hook in a few more rounds…..crochet it in with beads, and tassels, use an i-cord or a beaded i-cord….Use can place the opening in a different manner….Perhaps you can open up an entire side and fix a long zip around the opening….There is just so much you can do with this pattern….Go where your creativity takes you and have a lot of fun with…Hugs!

How to fix a frame to a purse(one that does not have holes)

How to fix a ‘frame with no holes’ to a purse


The first thing that I would advise anyone who is going to buy purse frames is …Buy only ones that have perforations on them..They are the easiest to work with.  Buy the ones without holes only if you have no other option. But with online shopping you will find that you are really spoilt for choice.

Here are some of the frames available online


The First one is without any holes/perforations on the frame. So to fix your purse to this frame…one has to push the material inbetween the two wedges of the frame and use a plier to calmp on it.

The rest of the frames have holes..so you just sew your purse on to the frame using the holes to attach your crocheted purse to the frame with a tapestry needle and crochet thread or any strong thread of your choice.

When you have a frame with no holes…

Once you finish the crochet part of your purse…finish your lining….and then proceed to fixing the frame onto the purse.

I made a coin purse with a frame which as you can see had no holes. It was very diffiuclt getting the material to stay within the two metal wedges. So my Husband suggested that I attach a metal wire(a thick one ) at the mouth of the purse.

The wire below is usually used for floral arrangements so it is flexible but holds shape.

I then measured the mouth of the purse (which was two hexagons) and cut a strip of wire…to size

             teh

Then…atttach your yarn to the purse…place this strip of wire at the mouth of the purse on one hexagon and begin to sc (single crochet) over it..covering it completely.

Do this on both sides of the mouth of the purse…

Now push the edges into the metal wedges of the frame….use a file or a thin knife or even your crochet hook to push the material…deep inbetween the wedges of the frame.

Use a plier and clamp down hard on the metal frame so that it fits snuggly over the wire in the mouth of the purse. Use a thick material over the frame and then clamp the plier over it….becos if you use the plier directly over the frame, it may get damaged. ( I have not shown this here…because I wanted to show you how the plier is used)

There you are a lovely coin purse…….

Hope you found this useful…..do comment below and let me know what you think of this post and tell me if you found this useful…..I would really appreciate your feedback…;-)

Vintage Table Runner

Vintage Table Runner

Crochet Chronicles: 

My elderly Parents live with my sister or she lives with them….depending on how you wish to see it…:-) . Both of them are in their 80s and are active both mentally and physically. Though my Father suffers from Parkinsons ( He still hasn’t reached that stage where he needs help)…he is always positive and a wall of strength to all of us. My Mother holds our home together….and is such a superlative cook…that we look so forward to meal times. Now she has taught the lady who helps out at home, Vrindha all her culinary tricks so that even when she does become incapacitated…her darling grandsons will still get those scrumptious delights. Parents….What are we without them? Who will love us, care for us, worry about us and be there for us like them? As my Parents grow older and more feeble…..I feel this sense of fear and despair at facing a future without them.

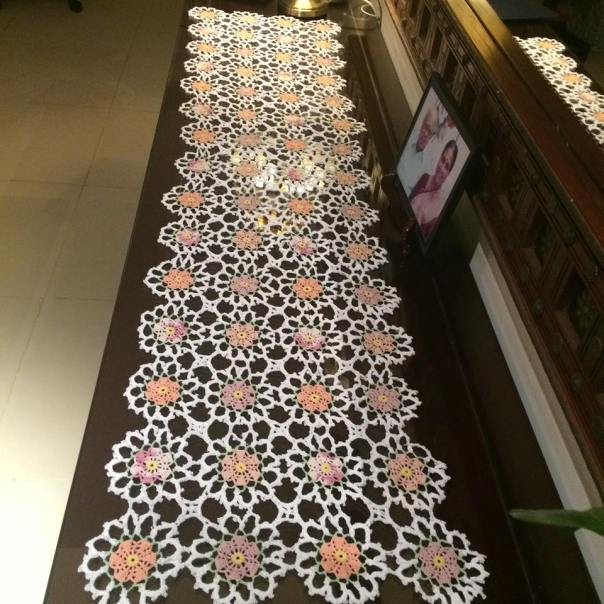
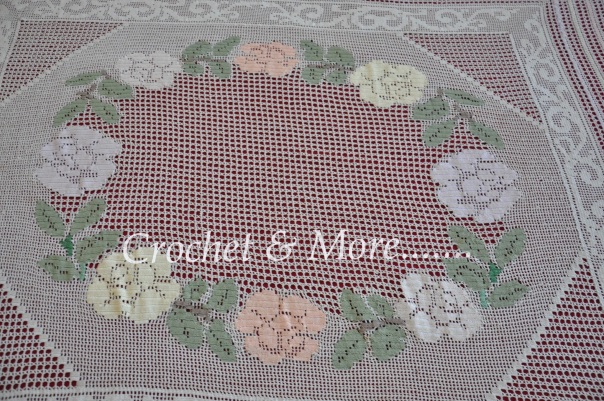
But enough of such dark and despairing thoughts…The reason I wrote about my Parents is because, this particular runner was made at my Mother’s insistence. My sister bought a new dining table and a chest of drawers to go with it…and all my Mom’s old and beautiful collection of laces wouldn’t do for this. So My scrupulous Mom…who has exceedingly very high standards on what goes on her furniture rang me up and told me that she wanted me to make her a table runner.

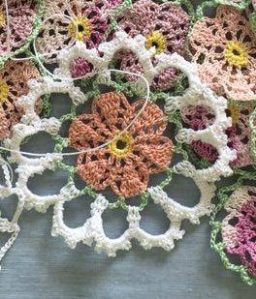
I was so thrilled! I never thought that my work would ever be good enough for her….I know she loves pastels and white….so I made this one in shades of ice pink, peach, lolly pop pink and white, mint green, light yellow and white. Though the original pattern is all in white…I thought this made an interesting  picture. What do you think?


Materials Used:

Anchor cotton #20 in pastel shades and white. I used 5 balls of white and 10 gms and a little less of each of the other colors.

Hook 0.75mm I normally use 0.9mm to 1.25mm with #20 thread…but decided to experiment with a much smaller hook. I like the lacy effect, though hooking is hard on the hand.

Pattern:

Since this is a vintage pattern, there is no graph as such…but there is a written pattern at this link, below:

http://freevintagecrochet.com/doilies/7717-doily-pattern.html

And as Always…here is the photo tutorial….

Runner measures about 14 x 38½ inches.

Each motif measures about 3½ inches in diameter.

FIRST MOTIF

Starting at center, ch 6. Join with sl st to form ring.

13081727_552952411558805_970560264_n


1st rnd: Ch 1, work 12 sc in ring. Join with sl st in 1st sc.


13101154_552957344891645_931585906_n


2nd rnd: Ch 5 (to count as 1 dc and ch 2), * dc in next sc, ch 2. Repeat from * around, joining last ch-2 with sl st in 3rd st of starting ch-5 (12 sps).


13077380_552957348224978_1531402859_n 13084273_552957334891646_2051752738_n

3rd rnd: Ch 3, 2 dc in same place as sl st, * ch 3, sc in next dc, ch 3, 3 dc in next dc. Repeat from * around. Join.

13081859_552957354891644_962207236_n


4th rnd: Ch 3, dc in same place as sl st, * dc in next dc, 2 dc in next dc, ch 4, sc in next sc, ch 4, 2 dc in next dc. Repeat from * around. Join.


13115770_552958191558227_1403379450_n

13081846_552958208224892_513314797_n 13115327_552958198224893_154325539_n

5th rnd: Ch 3, dc in same place as 3 ch, *dc in next dc, 2dc in next dc,  ch 3, skip 3 ch, sc in next sc, ch 3, 2 dc  in next dc. Repeat from * around, ending with ch 3, tr in 1st sc.

13101489_552958391558207_1700455324_n

13101484_552958384891541_773313651_n

13077136_552958401558206_122171011_n


Here I have changed the pattern from the original a little…

6th rnd: sc in same stitch as ss, Ch 7,  sc in top of tr just made, * ch 10, 1 sc in center st of next ch-7. Repeat from * around. Join.

13100990_552958534891526_1052217529_n

13084238_552958528224860_1113785931_n

13115510_552958604891519_1802798652_n

7th rnd: Sl st in next 2 dc, * in next loop make (4 sc, ch 4) 3 times and 4 sc. Repeat from * around. Join and break off.


13115510_552958604891519_1802798652_n-2


SECOND MOTIF … Work same as for First Motif until 6th rnd is com­pleted.


7th rnd: Sl st in next 2 dc, * in next loop make 4 sc, ch 4 and 4 sc; ch 2, sl st in corresponding ch-4 loop on First Motif, ch 2, in same loop on Second Motif make 4 sc, ch 4 and 4 sc. Repeat from * once more. Complete rnd with no more joinings.


13115510_552958604891519_1802798652_n

Make 4 x 11 motifs, joining them as First Motif was joined to Second Mo­tif and leaving one large loop free be­tween joinings.


13084234_552958541558192_274889797_n


13081833_552958748224838_1327630115_n-2


Unfortunately..I was travelling while the next part was being hooked and the pics just didn’t come out right…..However the written pattern below will def help..

FILL-IN-MOTIF … Attach thread in center ch-4 loop of any large loop between joinings.

1st rnd: Ch 3, 2 dc where thread was attached, * ch 5, 3 dc in center ch-4 loop of next large loop. Repeat from * 2 more times; ch 5, sl st in 3rd st of starting ch-3.

2nd rnd: In next ch-5 loop make 4 sc, ch 5 and 4 sc, * 4 sc in next loop, ch 2, sl st in last ch-5 loop, ch 2, 4 sc in same loop as last 4 sc. Repeat from * around. Join and break off. Press through damp cloth. Starch lightly and press.

 13090047_552958864891493_1337790906_n

Crochet Hearts

How to Crochet Hearts 


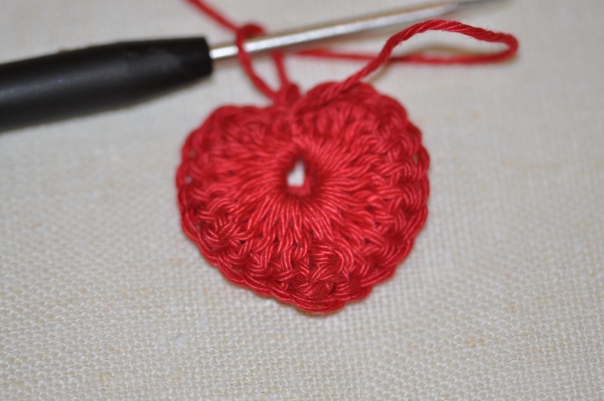
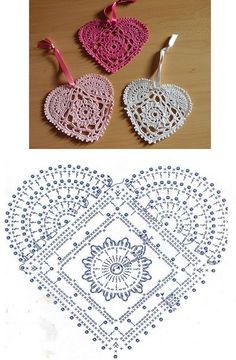
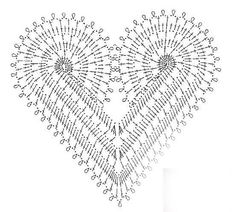
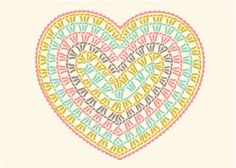
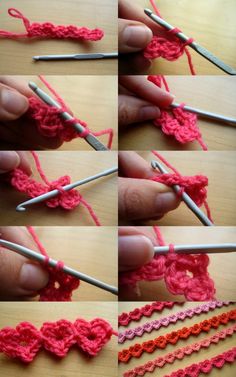
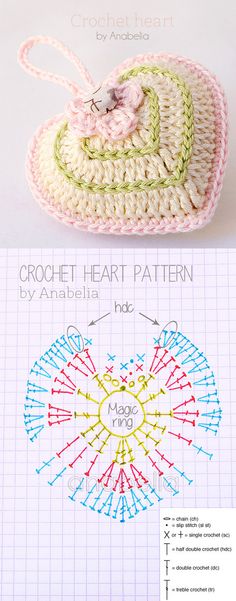
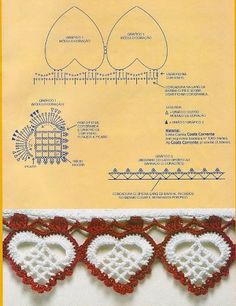
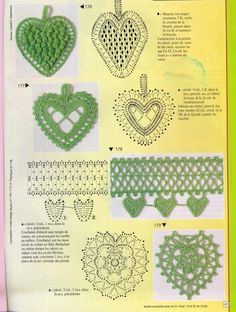
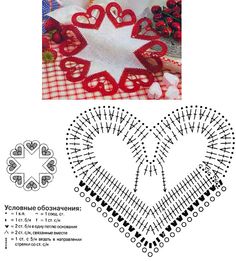
We women love to make hearts…..the fact that the diagrammatic representation of the heart has no similarity to the original organ hasn’t fazed us at all. We have decided that this is what we would like the organ to look like. Crocheters from all walks of life have created such beautiful designs that I find it difficult to choose which and what patterns to include here…1800352_363662473771684_616634949_n

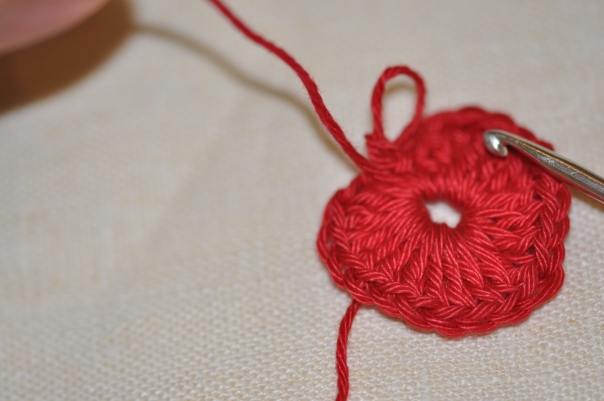
 Basic and simple Heart Pendant

4847ac8edc0b5f199252dc55e28a1058

Method to Make this very simple Heart

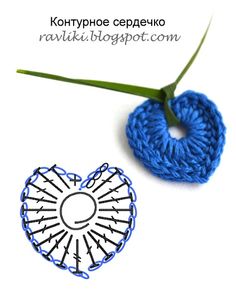
Make a Magic Ring.

Then one chain, one sc, 1 hdc, 9 dcs, 1 trch (treble crochet), 9 dcs, 1 hdc, 1 sc each one chined into the ring.

ss into the base of the first chain.

Then pull on the tail of the magic ring to reduce the space of the loop…..Voila you have a lovely crochet heart…String it onto a satin or silk ribbon…and you have a lovely piece of jewellery…all made by yourself.


DSC_9525 DSC_9528 DSC_9529 DSC_9530 DSC_9532 DSC_9533 DSC_9534


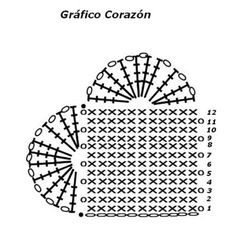
Simple Heart Pattern with Tutorial( no Photo Tutorial here)d9668f314db645a3f5d46ff0b475e54c

Row 1:

Chain in 11 plus one  – Total 12 chains

Row 2:

Single Crochet into the next 11 chains, Turn

Row 3

1 ch up, sc in same loop, sc  into next 10 stitches.

Row 4 – Row 12

Repeat as in Row 3

After Row 12 . Cut thread and tuck in the tails.

Now you have the square base of the heart….The next step is to hook in the 2 arches that make the top portion of the Heart.

1.Join thread on the left side of the square at row 4 and chain in 5; ss in the 8th row.

2. Ch 5,  ss in the  first sc of row 12;

3. Double Treble Crochet: ( yo 3 times) into the half ring that you have created, Ch1;* Dtrch, 1ch*; Repeat ** 8 times…ss into the sc of the first row, after the last dtrch made.

4. Cut thread and tuck in.

To Make the arch of the heart on the other side…Join thread on the 12th row in the 4th sc, chain 5 then ss in the 8th sc of the same row.( counting from right to left)

The repeat steps 2, 3 and 4.

Voila a Beautiful Heart!!!
 

Different  Heart Patterns 

468d1d12c0ebe74f923e01fe65cf0432


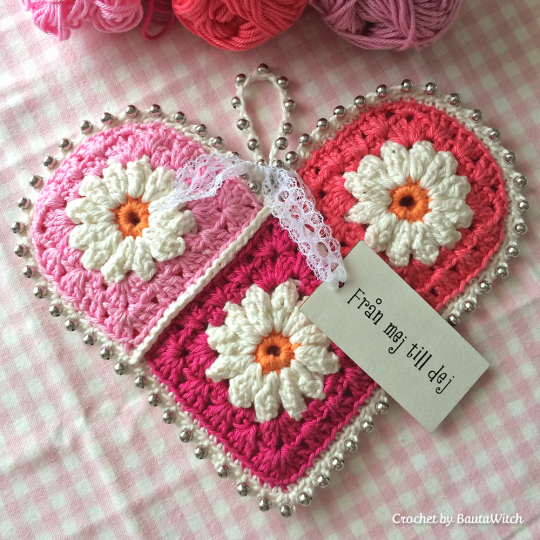
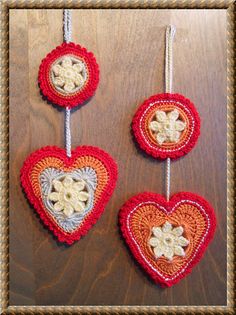
 Hanging Hearts


569fad76eb270131bb54c6e7ceffa3d3 crochet-valentine-heart-by-bautawitch 8674fb63a8aab5bcbef46040d81290b0


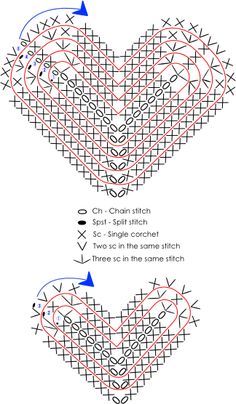
Heart Pattern worked in Single Crochet

8262a5163332b642623f9395d2051681


Heart Pattern Worked in Double Crochet            

a0033fd5788fc4ccd9cd4349a21ccf1f


Heart Pattern Worked as in a GSq..


b231e7818902236fc440fe5bd43a4095


Heart Edging 

fb9ce80c39734abcb0563537aa76848d


Heart Basket 

b5e822ca420f21a91b130b9355778a76


 Heart Pouch


404ae82c89a9dbe30c97143527a12e23


Heart Thorans/Buntings


db54b18ca49ffddc734923fb54c46a9c               5dd5df86d733dfb5da347496939fe267

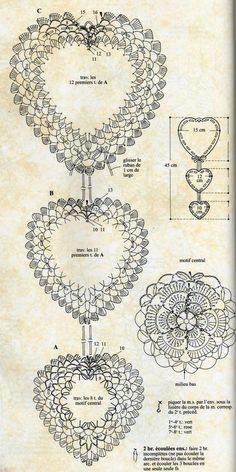
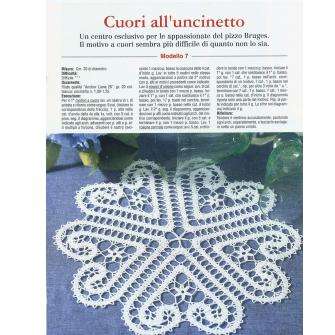
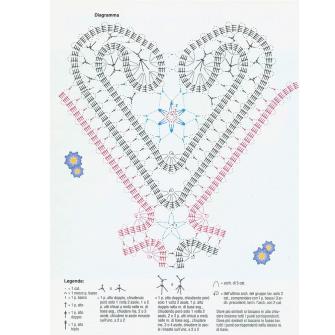
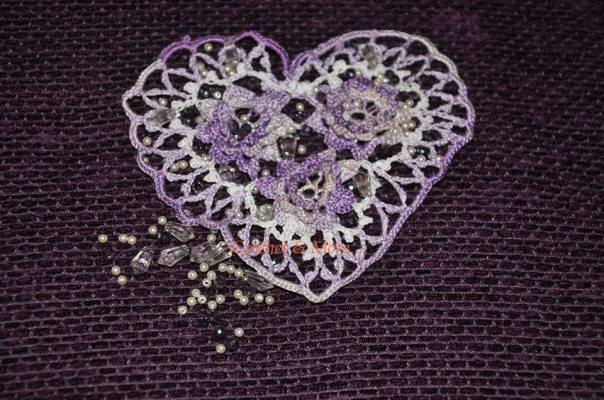
Crochet Heart Doily

katreirenk_1276771923 katreirenk_1276771934


Pattern for Heart Cushion

http://mossitabellacrochet.blogspot.com/2012/01/cojin-de-corazon-granny-crochet.html


Pattern For Heart Doily

2f615ed5cf15aff091ac437fe2895d51


 Irish Crochet Heart(Pattern in Flicker)

1560677_362928887178376_1625204176_n

So see how easy it is to crochet a heart and how many types of crochet hearts are just waiting to be made by you…….As I always say…Have fun…enjoy the ride and keep that beautiful smile on…..The world needs intrepid and talented crafters like you!!!!

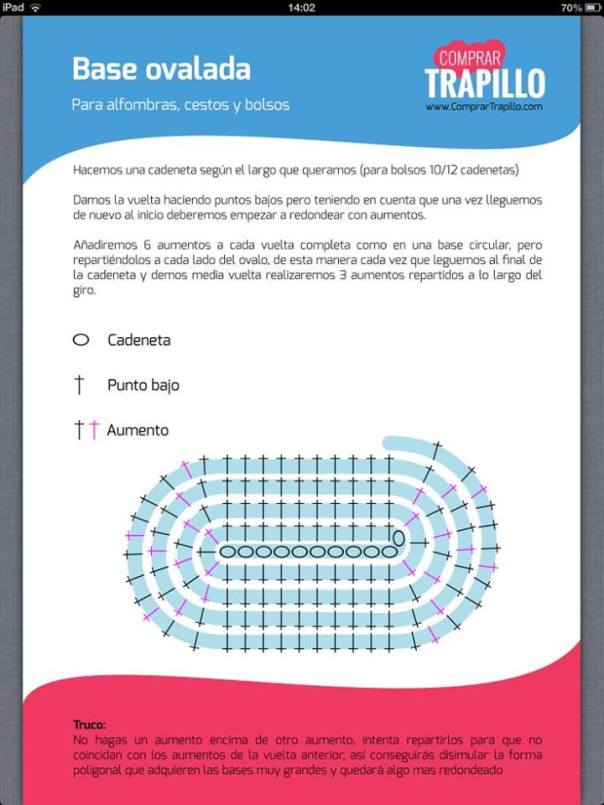
Crochet Ovals


Crochet Ovals

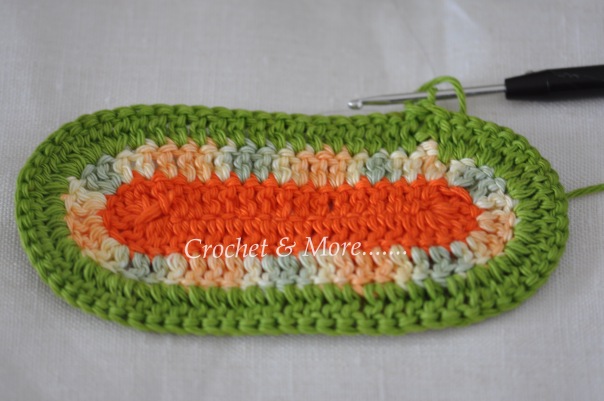
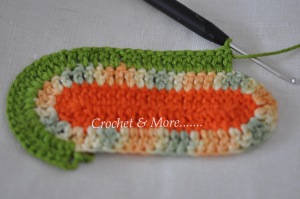
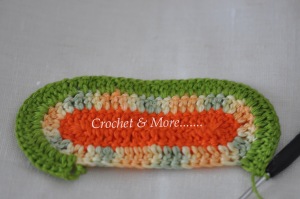
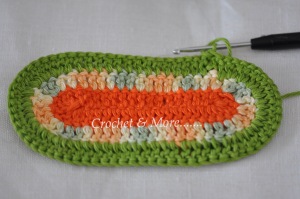
DSC_9524

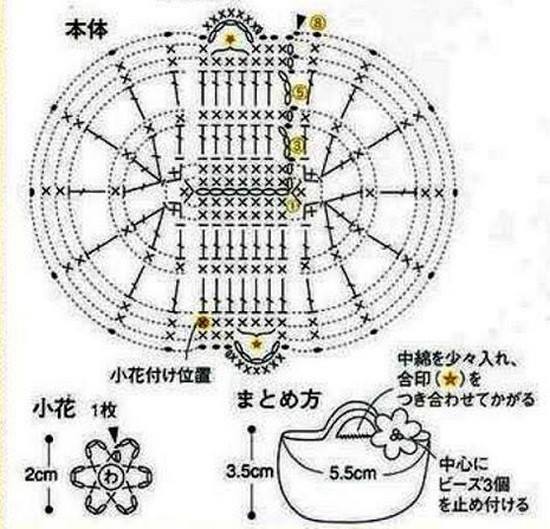
I never quiet realised how much one can do with crochet ovals. To me the extent to which you can use this shape began and ended with doilies and table runners. Then Pinterest happened and it opened up a whole new world. There are crochet oval rugs, placemats, coasters,Bag bases, baskets, the oval shape required for eyes for an amigurumi project etc….

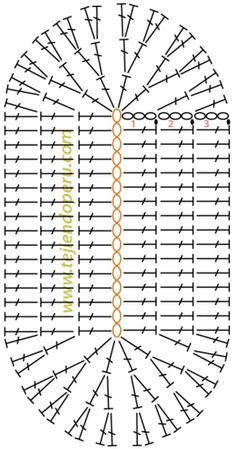
Here we will learn how to crochet  a basic oval pattern, This is a closed pattern where in there aren’t much space in between the stitches…so this is a great pattern to use when you are thinking of a bag base.


Abbreviations Used:

ch – chain

dc – double crochet

ss – slip stitich


To Begin With:

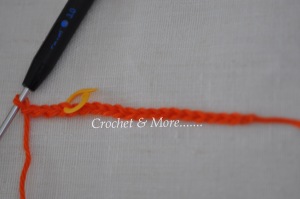
Hook in 16 chains.

4cfacb8e2ebcef031f96b03cd334495e

Round 1:

Hook in 16 chains.

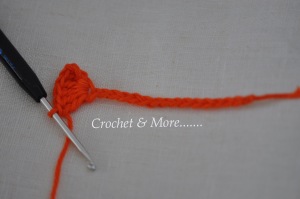
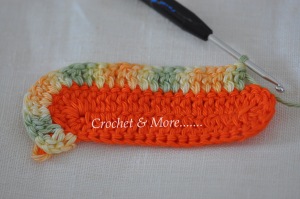
3ch up, 5 dc in same chain(turning stitch); Then one dc in each of the following chains until you reach the last chain; 6 dc in the last chain, slip stitch in the 3rd chain of the 3 chain up at the beginning of the row.

DSC_9502 DSC_9504


DSC_9505 DSC_9506


Round 2:

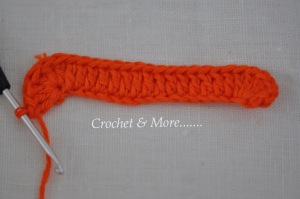
3 ch up: 2dc in each of the next dcs of the previous round;  1 dc in next dc. (Turning stitch)

1 dc in each of the next 14 dcs; Next stitch is dc on dc of previous round; Then 2 dc in each of the next 4 dcs; dc in dc; 1 dc in each of the next 14 stitches; ss in the 3rd ch of the 3 chain in the beginning of  round 2.


DSC_9516 DSC_9517

Round 3:

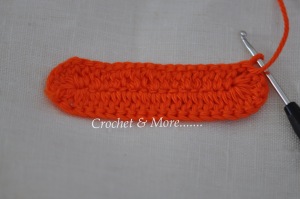
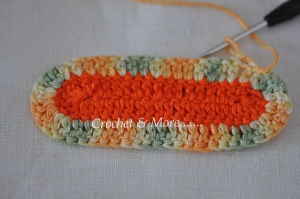
3 chain up. 2 dc in each of the next 10 dcs. 1 dc in the next 14 dcs.2 dc in each of the next 10 dcs.1 dc in the next 14 dcs.ss in the 3rd ch of the 3 chain in the beginning of round 3.


DSC_9519 DSC_9520


DSC_9521 DSC_9523


DSC_9524


How to crochet oval eyes for ur Amigurumi projects

Bread Basket

http://todays232.rssing.com/browser.php?indx=6172672&item=104

Oval basket

http://www.antiquecrochetpatterns.com/easy-crochet-basket- pattern.html

Link to oval doilies

http://crochet.about.com/od/oval-shape/tp/oval-pattern.htm

Link to oval placemat

http://www.redheart.com/free-patterns/oval-placemat-coaster


Pattern For an Oval Basket


10645242_1522619784643790_9166515057964343060_n


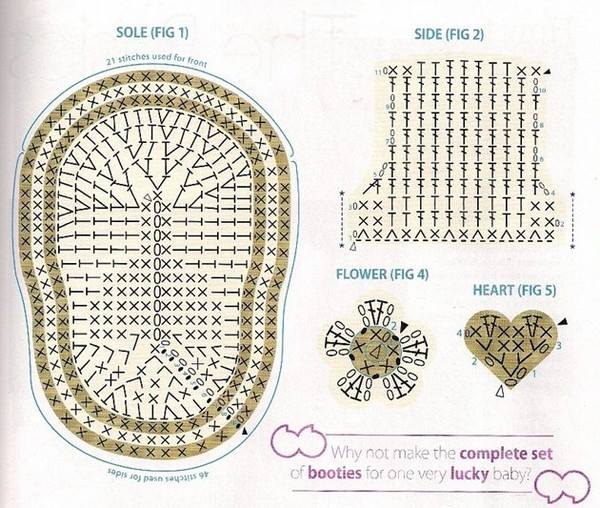
Pattern For Baby Booties

1978881_10152878506907250_4457436093266038470_n


Spiral Oval


10289975_1526873477551754_1701952373143054662_n


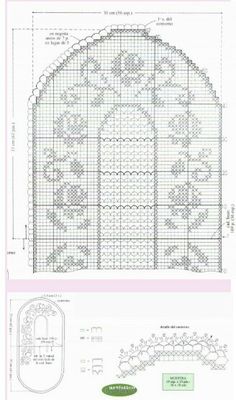
Pattern For An Oval Table Runner

939d35b6aaa25b2844fb542e4a79fadf


Click to access oval_base2.pdf


So there you are……Crochet Ovals……a lovely and elegant shape that lends a kind of dignity to your work.  Did you find it easy to work on? Do let me know ….Sayonara for now….Next Post How to crochet the diamond shape.

Filet Crochet – How to and Patterns

FILET CROCHET

859484_224903747647558_145018107_o

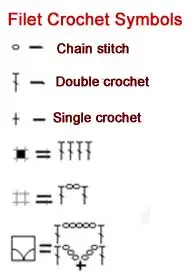
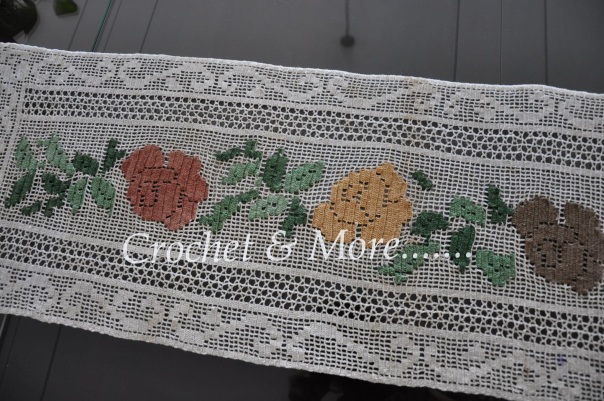
Filet in French simply means ‘net or a mesh”. So filet crochet is Crochet patterns made in a net or a grid. It  uses just 3 basic stitches like the chain stitch, the double crochet and the single crochet.

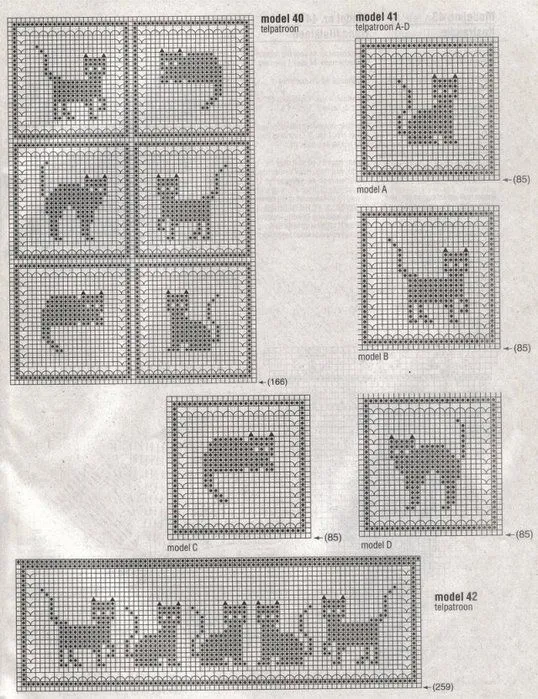
Used in as many permutations and combinations as possible, this is reminiscent of cross stitch in that, you can use a graph to create your own designs and patterns.

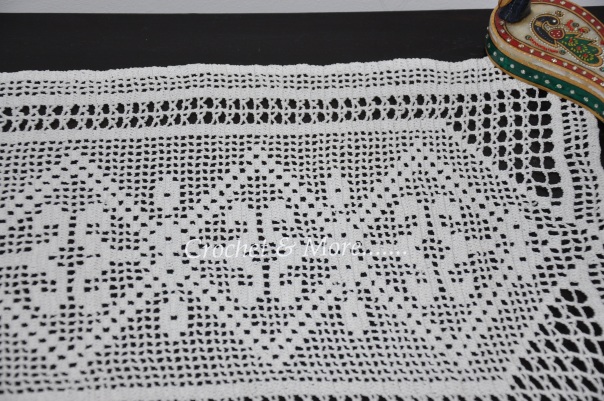
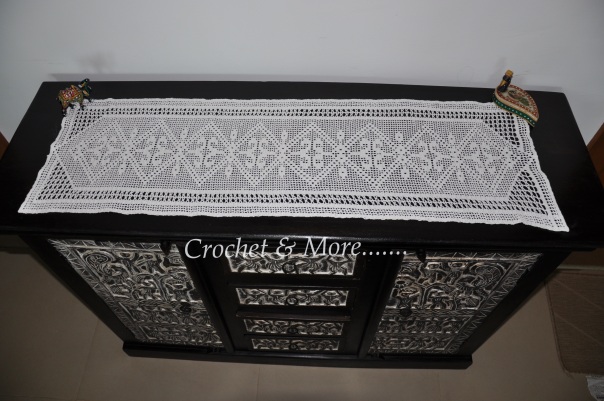
Here are a few examples of Filet Crochet……..

DSC_6632

DSC_6633

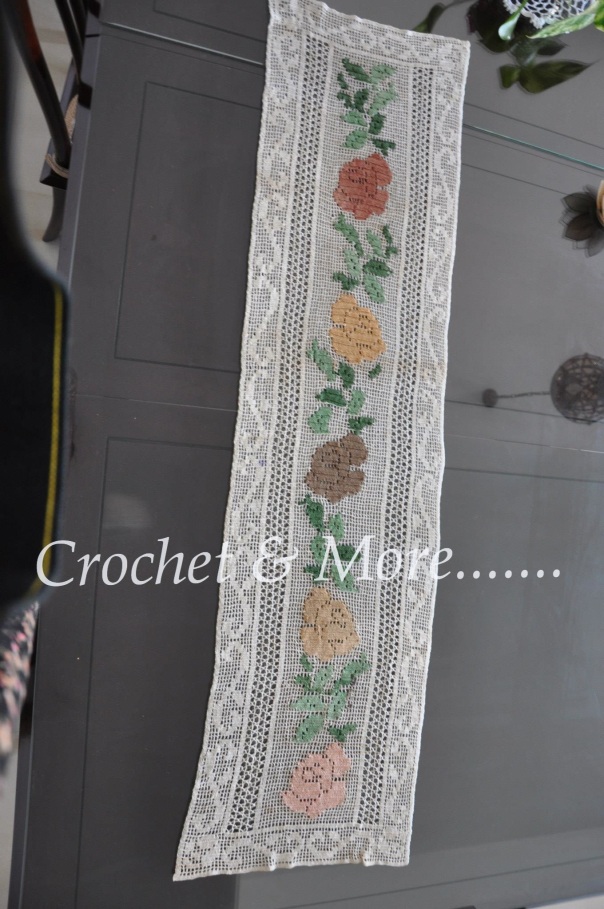
Adding Colours to Filet Crochet adds a whole new dimension to your work.

856574_221556944648905_654700002_o

1167268_298301913641074_1394369628_o

Here are the symbols of the stitches used in Filet Crochet.

filet-crochet-symbols

How to Filet Crochet

Pls note that in this video the demonstrator uses the term treble for double crochet….In UK ……dc is termed as treble….but the stitch used is dc.

This is how a filet crochet grid will look like…when you fill in the grid with dc’s….it is called a block.

31b6a053afcf8a15e17e61fb87d428b4

filet crochet detail


A Photo tutorial on how to create a multitude of patterns using the grid, block and filet bar….

filetcrochet

How to crochet a Filet Bar

8af9c5b9ae94eaaecf23e1a946f86c94

How to read a filet crochet chart

To do filet crochet effectively, you should know how to read a filet crochet chart…the link below has a very effective and detailed description. It also has a whole page full of filet crochet patterns especially for beginners.

http://stylish-crochet.blogspot.com/2009/02/how-to-read-filet-crochet-chart.html

Important Tips to keep in mind while doing Filet Crochet

1. Filet crochet is best done in mercerised cotton…for e.g…#3,#5, #20, #30,#40 to #100. The patterns made with this kind of crochet is seen better when you use thin thread. Thick yarn usually blurs the overall effect.

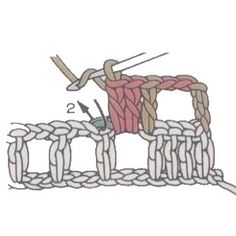
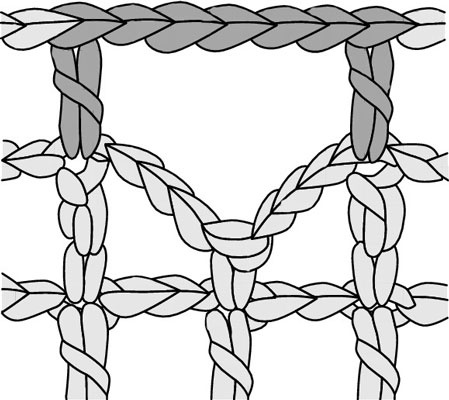
2. While  hooking a grid with blocks, remember that the dcs always sit on the dcs of the previous row in a block, but is  always hooked over the chain of the grid space. This gives your work a neat appearance because it covers the chain of the previous row.

3. How to Calculate…How many chains you will need for the foundation row.

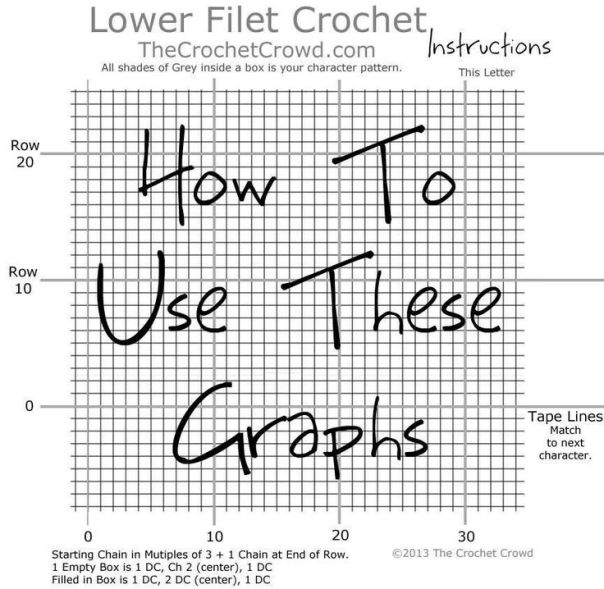
Number of squares across the filet crochet chart multiplied by 3, to that add 3 chains more if you are starting with a block and add 5 chains more if you are starting with a space.

# of sqs in chart x 3 + 3 = If you are beginning the grid with a block

# of sqs in chart x 3 + 5 = If you are beginning the grid with a space.

How to create a graph for filet crochet

To create patterns of your own…you can use the link tutorial which can turn almost any photograph into a filet crochet grid for you.

http://theindigophial.blogspot.com/2010/10/how-to-create-filet-crochet-pattern.html

0b30c55f2d6fcaddc1571265abe70fdd

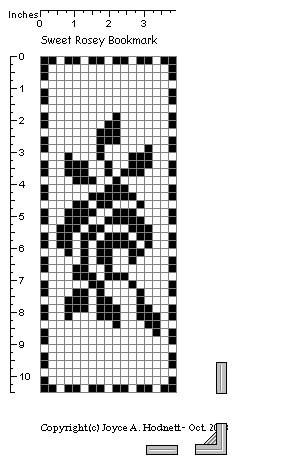
FILET CROCHET GRAPHS for Beginners

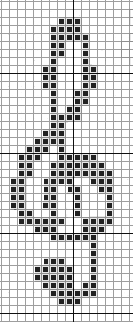
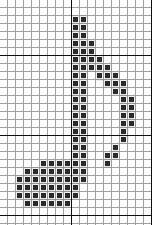
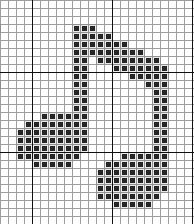
The net has a vast number of filet crochet charts…I have just used a few here…check Pinterest for a feast of patterns.

8673cd655f225859ec98dc4d99c2ac4d.jpg 169a05562c69356fd73b9c2be16e354f

TrebleClef                   NoteEighth                NoteDouble

162d7230fb9fbc55ece70b5e13f59d14

More Filet Crochet Pattern Links

Filet Crochet Sayings:

http://www.yarnyokel.com/free_filet_crochet_patterns.html

Filet Crochet Blouse:

I will be adding the link to increase and decrease in filet crochet next week…so do check in here for an update.

As you can see Filet Crochet is as sweet and easy as Apple Pie is to the taste buds…..:-D!!!

 Take your time Learning and More importantly …Enjoy the journey….Loads of Love…..

 886778_224899897647943_712301761_o

HOW TO CHANGE COLOURS IN CROCHET

How to change colour in crochet

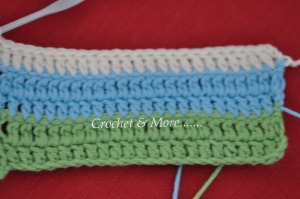
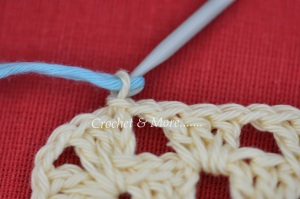
Colours add a new and vibrant dimension to you crochet work. When you add a different colour to your work, the thing to keep in mind is that there are 2 ways to changing colours.

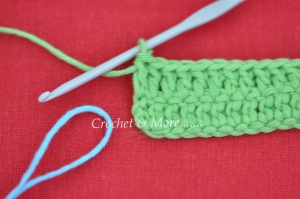
1. Adding colours with a basic knot:

This is easy for beginners because they don’t have to worry about pulling the base thread tight as they work to make those first chains. The down side ,is when you use this method with thick yarn…the knot will protrude a little and the work doesn’t look so smooth. This method is alright with very thin thread..for e.g. #20 onwards to #100.


DSC_8296 DSC_8298 DSC_8306 DSC_8307 DSC_8308 DSC_8310 DSC_8313 DSC_8317

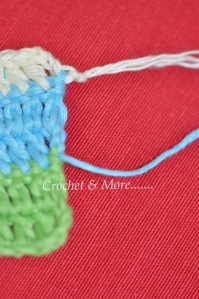
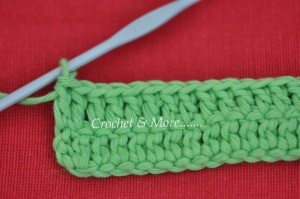
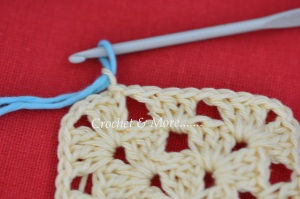
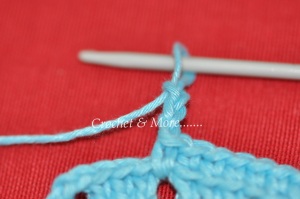
2. Adding colours without a knot:

DSC_8266 DSC_8267 DSC_8268 DSC_8269 DSC_8271 DSC_8276 DSC_8278 DSC_8280 DSC_8282 DSC_8284 DSC_8286

This gives your work a seamless quality………the yarn just sort of glides in and is good for all kinds of yarn and thread crochet work.

The knot on the cream yarn will be tucked in but you will feel it if the yarn is thicker.

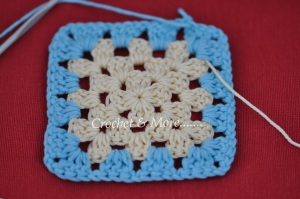
Adding  another colour to a granny square:

The technique is the same. How ever many colours you add to each row….

DSC_8319 DSC_8320 DSC_8321 DSC_8322 DSC_8323 DSC_8329 DSC_8342

And that is it…Easy Peasy…..:-D!!

Beginner’s Guide To Basic Knot, ch and ss – 1

BEGINNER’S GUIDE TO CROCHET BASICS – 1

Basic Knot; Chain(ch);slip stitch(ss)

Crochet is not difficult…in fact it is one of the most easiest of crafts to learn and one of the most comforting. A great stress buster and unlike many other crafts doesn’t need much equipment….one hook and a ball of yarn ….and  you are all set to go!

Crochet is very flexible and forgiving in that, one or 2 stitches missed or added doesn’t really matter in most patterns. You can do crochet almost anywhere and should you make a mistake it isn’t difficult to rip it off and start all over again…..

Crochet stitches aren’t complicated….once you learn the basic chain and double crochet ….you just build on that… Here we will, be learning the eight basic stitches on which most of crochet is based on.

We will be learning the,

1. The Basic Knot

2. The Chain Stitch – ch(Abbreviation)

3.Slip Stitch – ss((Abbreviation)

4.Single Crochet – sc(Abbreviation)

5. Half double Crochet – hdc(Abbreviation)

6. Double Crochet – dc(Abbreviation)

7.Treble Crochet  or Triple Crochet – tr(Abbreviation)

8. Double Treble –  dtr(Abbreviation)

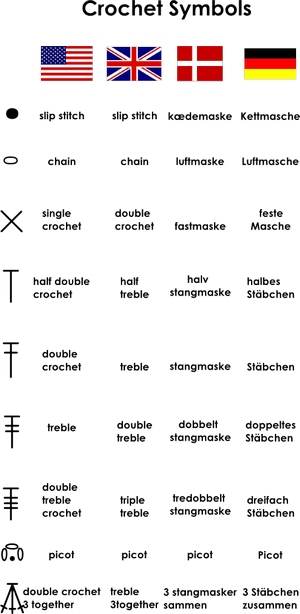
Crochet Symbols and Abbreviations :

Each stitch with the exception of the basic knot is represented by a symbol. You should know these symbols and abbreviations by heart since these are your building tools in reading crochet patterns.


              4f7c7c6dc2a21b1d062fbf0e724d10fd ob_7e4fd2_ob-0a449541b65488adf073836ed21ceb26-crochetsymbol


How to hold a crochet hook while crocheting:

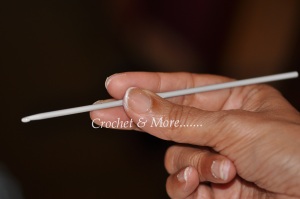
Hold your Crochet hook between ur fore finger, middle finger and thumb gripping the hook at it’s flattest surface. Do not hold the hook too tight or too loose….just firm enough for it to work for you. The main thing is to be relaxed.


DSC_7701


How to hold the yarn while crocheting:

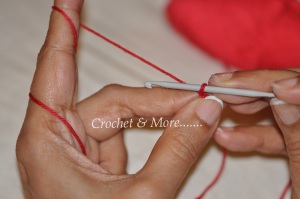
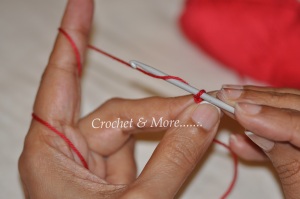
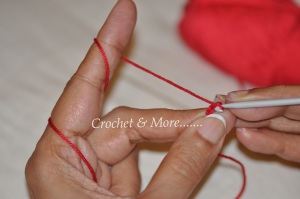
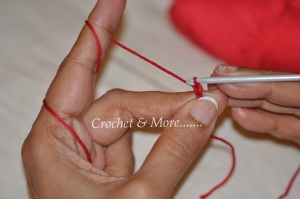
There are many ways to hold yarn while crocheting. This is the way I hold yarn while making the basic knot and it works for me.

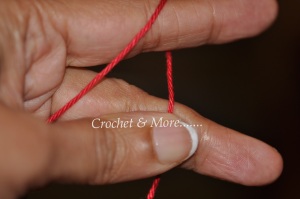
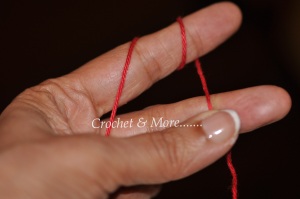
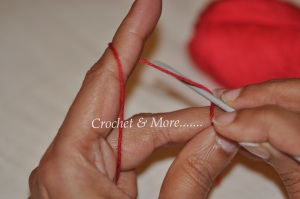
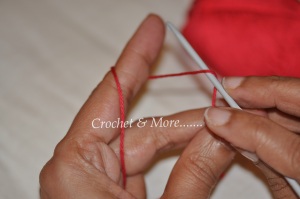
Google as many ways as you can find and choose the way you think works for you. Hold the open end of your palm in front of you facing you.   Place the tail end of the yarn over the palm and wrap that end over ur fore finger.


DSC_7694 DSC_7695


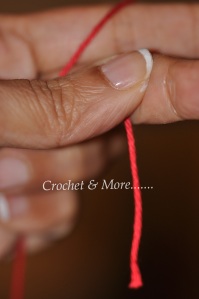
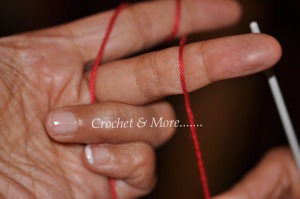
Then bring the tail end of the yarn over the other three fingers and grip the tail end between your ring finger, little finger and thumb. Hold it firmly….not too tight or too loose. This is where you get the yarn tension right.

What is Yarn Tension?

Yarn tension is how tight or how loose you crochet and it differs from person to person. It is better to hold your yarn just right so that all your stitches are even. Don’t worry if you can’t do it right the first few times…this comes with practice. Stick to it and you will master it soon enough.

Don’t compare your pace with anybody else’s. Each person is different and mastering a crochet stitch fast or slow doesn’t make or break you…You are, and will always be that special edition that God created with love.


DSC_7699 DSC_7700


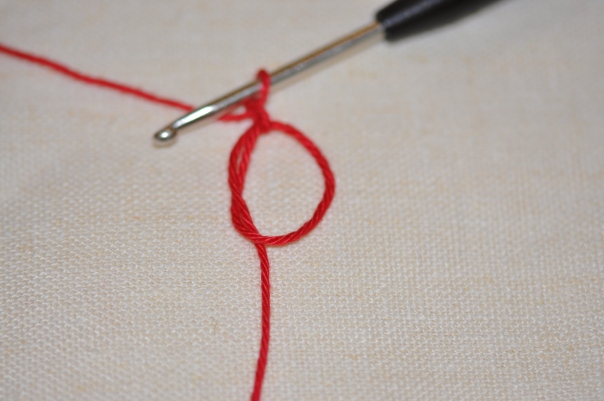
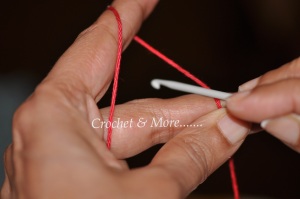
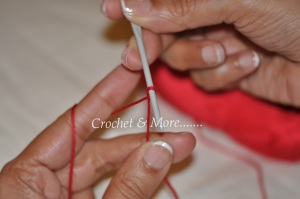
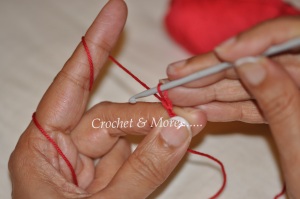
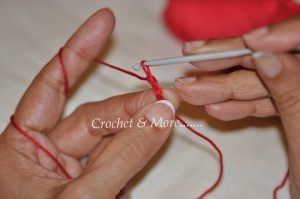
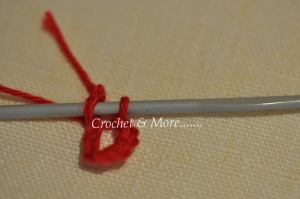
1. Basic knot: The basic knot is the first knot you make to build that foundation chain. It is easy to do…..but needs a bit of practice. Push your hook under the yarn which is held between your fore finger and your middle finger.

DSC_7702 DSC_7703

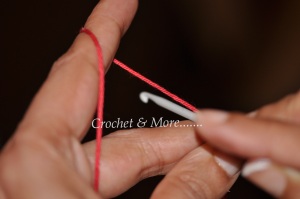
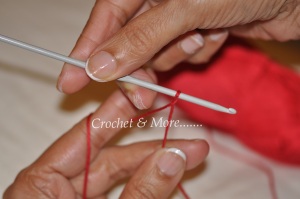
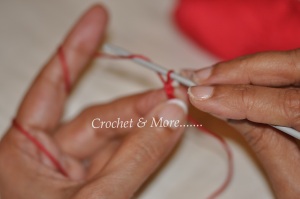
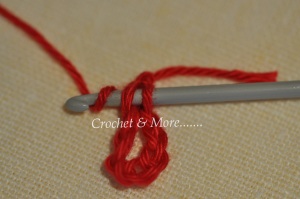
Lift the hook up so that it brings the yarn over(yo) it up as well. Yarn over is an important tern used in crochet. It amply means to wrap the yarn over the hook. And the abbreviation used is (yo).

DSC_7704 DSC_7705

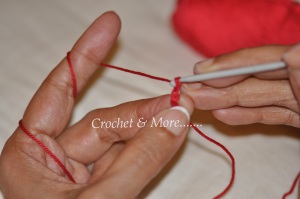
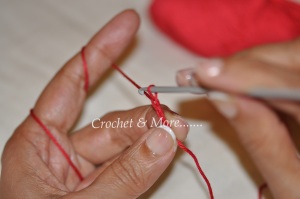
Now twist the hook around along with the yarn to 360 degree circle so that a loop is formed.

DSC_7707 DSC_7708 DSC_7709 DSC_7710 DSC_7713DSC_7718

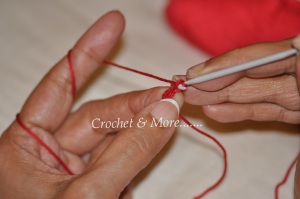
Then yarn over and hook in the yarn through the loop .

DSC_7714DSC_7715

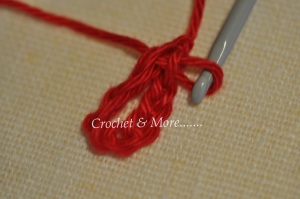
A knot is formed at the base of the loop. You can increase or decrease the size of the loop by pulling the main end of the yarn. . .

DSC_7717

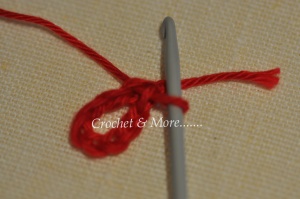
There you are ….the Basic Knot.

DSC_7719

How to make a Chain Stitch:

Chain stitch forms the foundation to most crochet projects.  Again hold your yarn taut….but not too tight or loose. Push the hook under the yarn ..Yarn over. Hook the yarn.

DSC_7720 DSC_7721

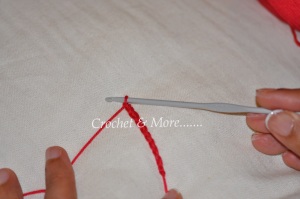
Pull the yarn with the hook thru the basic knot….

DSC_7722 DSC_7723

And your first chain is formed.

DSC_7724 DSC_7725

Push, yarn over, Pull thru the previous chain…..

DSC_7726 DSC_7727 DSC_7728 DSC_7729

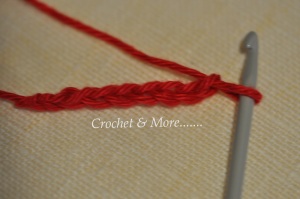
A string of chains…… .

DSC_7730

How to make a Slip Stitch(ss) :

Slip Stitches are used to join pieces of crochet together, to end a project, to make the rim of a bag, basket etc, to shape a neckline, arm hole, or any thing really. It is a very versatile tool to have in your crochet kitty.

Slip Stitch is done by increasing the loops on your hook by two and then pulling the yarn through both the loops thus decreasing loop on the hook back to one.

Leaving one loop on the hook, push the hook into the first chain of the foundation chain

DSC_7875DSC_7879

yarn over

DSC_7886

Pull the yarn through both the loops ….now you have just one loop on the hook

DSC_7887

That’s it slip stitch…..and you now have a crochet ring.

DSC_7888

This is a video tutorial that I made…it’s a very rough version…cos it’s the first time I have done anything like this….I need to edit this….but  have yet to learn that….I will be doing so once I climb that mountain.

This can also be used as a base to make a crochet  circle. That’s your 3 stitches for now….Practice these well…until you get a string of even chains.

My next post will be on 3 other stitches…..Single Crochet, Half double crochet and Double Crochet .

Adios…Amigos….:-D!!! For now….

Know Your Wool-Yarn/Hook

YARN GYAN – Wool 

Last time I made that post on cotton Yarn/thread…..Among the many comments that I got, there were a few queries on the title of that post   –  ‘Yarn Gyan’.

My readers, tell me …we know what yarn is ….but what is Gyan?   Gyan, means knowledge, know how, etc……..:-D!!!

Wool is one of the most commonly used materials to crochet…..considering that this art form emerged from the west..France to be precise….that comes as no surprise.  In the West, they have made an art form of producing wool yarn in zillions of avatars…that wading through them is, though a delicious and delightful proposition….. also very confusing to most crocheters.

Yarn here comes in a multitude of hues, shades, colours, thickness and texture. I will broadly classify here what  I know of  wool as yarn….for Beginners. Once you master these very basic facts….You need to take that journey of discovery alone….because believe me, when I tell you that ….experimenting, with different fibres and hooks may not add pretty projects to your crochet resume in the speed that you wish…cos you will make time consuming mistakes…but the experience you gain is tremendous.

WOOL:

What is Yarn Weight?

Yarn Weight refers to the thickness of yarn used by Crocheters, Knitters, Weavers and other fibre artists.

Broadly wool yarn can be divided into 6 categories.

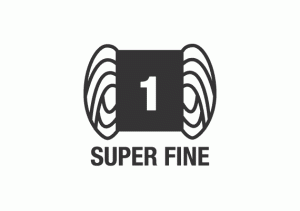
1. Super Fine:

This is also known as fingering yarn. It is a very light weight yarn.eg: Merino wool.

The UK/ Australia follow a  system…..where yarn is differentiated by ply.

It is represented by the emblem below, by the Craft Yarn Council of America in the USA.

 1superfine

So if, super fine is 1 in the USA….it is known as 3ply/4 ply in the UK/Australia

Recommended Hook Sizes:

Size will be B1 to E4( USA) or 2.25mm – 3.5mm(Metric)

Gauge for a 4″x4″ swatch will be between 21 stitches to 32 stitches across.

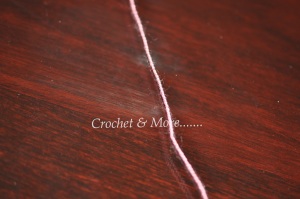
Super Fine Yarn
Super Fine Yarn

Used:

Crochet/ knit  socks, baby wear and other lacey items.

2. Fine or Sport yarn:

This is fine sport weight yarn.

Known as 5ply in UK/AUS

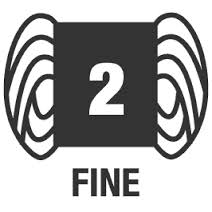
In the USA…it is represented by the emblem below…and is seen on the yarn label.

Unknown-5

Recommended Hook Sizes:  Metric 3.5mm – 4.5mm USA Hook Size E4 – E7

Gauge:  For a 4″x 4″ swatch, it would work up between 16 – 20 stitches across


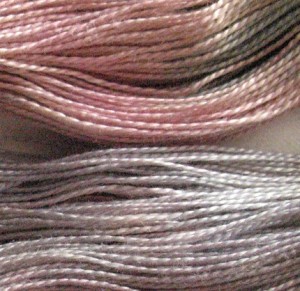
Fine Yarn Fine Yarn

Used:

it is great to hook  lacey shawls, wraps accessories, baby items.

3.  Double Knitting(DK)

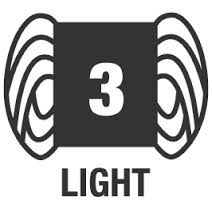
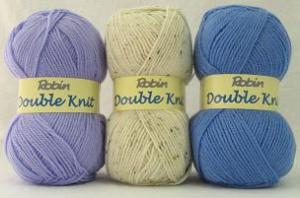
Also known as Light worsted Yarn. This is baby/ light weight Yarn for garments. In the UK/AUS it is called Double Knit Yarn/ 8ply.

This is a yarn that works well for all categories of crocheters. It is specially good for beginners. It is one of the most popular category of yarn used in the USA.

In the USA…it is represented by the emblem below…and is seen on the yarn label. Unknown-7

Recommended Hook Size:

Metric 4.5mm – 45.5mm

USA E7 – 19

img_0022_4_5 ROBIN DOUBLE KNIT 100

Gauge: For a 4″x 4″ swatch, it would work up between12- 17 stitches across

Used: 

For Hats, Fingerless gloves, sweaters, heavier baby Blankets

4. Worsted:

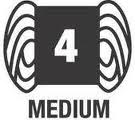
Called medium Worsted/ Afghan/ Aran yarn. This is the most popular od knitting and crocheting yarn in the USA.

In the UK/AUS this is the equivalent of 10ply or Aran weight

In the USA…it is represented by the emblem below…and is seen on the yarn label.

images-7

DSC_7481

Recommended Hook Sizes: Metric 5.5mm – 6.5mm USA 19 – Size K or 10 and a half

Gauge: For a 4″x 4″ swatch, it would work up between 11 to 14 stitches across

Used: Blankets, Slippers, Adult Garments, Throws, Afghans etc.

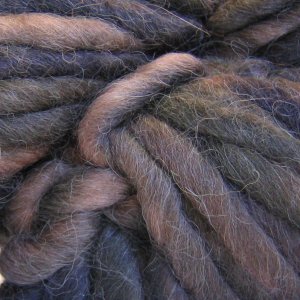
5.Bulky : Also Called Chunky/ Rug yarn. It is heavier than Medium Worsted but works up much quicker.

Bulky Weight Yarn in the UK/AUS…13 ply In the USA……it is represented by the symbol below:

Unknown-6

Recommended Hook Sizes:

Metric 6.5mm to 9mm

USA 10 and a half (K) to M

In the USA…it is represented by the emblem below…and is seen on the yarn label.

5145Large images-4 images-6

Gauge: For a 4″x 4″ swatch, it would work up between 8 – 11 stitches across Used: Used to hook unique hats, scarves and is good to decorate as well.

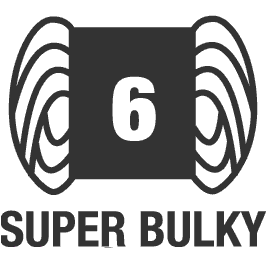
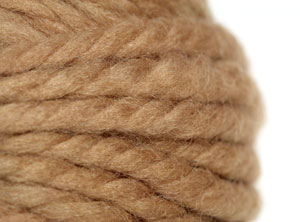
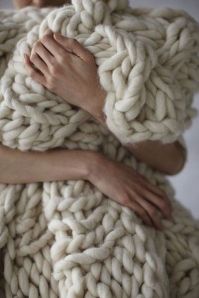
6. Super Bulky Weight Yarn:

A very Heavy Yarn, about twice as thick as worsted weight.

UK/USA equivalent to 14 ply.

In the USA…it is represented by the emblem below…and is seen on the yarn label.

yws6

big l_f8addc10-4d18-11e1-95b9-6130abe00001

What is the difference between Worsted and Medium Yarn?

It is one and the same. Both are 10ply. Just called by different names.

What is the difference between Worsted and DK yarn?

Unknown-3

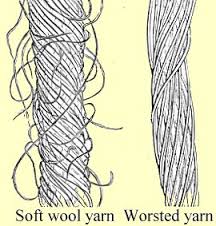
Worsted is 10 ply and Soft wool or double knitting yarn is 8 ply, thinner and softer. 8 ply is most commonly used in Europe and Australia.

What is the difference between Worsted and  Bulky?

Worsted Wool is  thinner than Bulky ….which is thick.

What is gauge?

Gauge is determined by yarn thickness. When you hook up a swatch the number of stitches in say a 4’x4″ swatch is the gauge of that yarn.

How does one read yarn labels?

Info on a yarn Label

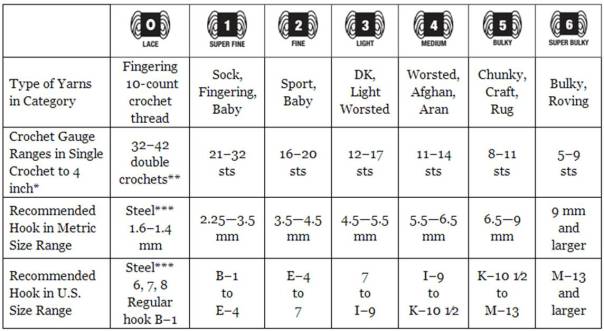
Tabled Chart from the Craft Council of America showing the yarn weight and hook size to be used for each yarn

Yarn-Weights1

What are the factors that affect ur project?

1. Yarn Type

2. Hook Size

3. Individual Tension( How tight or how loose you crochet)

What is Ply?

What is Ply? Ply simply means that when the yarn is spun it is spun by twisting 2/3/4/6/ 8/ etc strands of thread together…….For e.g.: if the yarn has two strands of thread spun in …it is called 2 ply. If it has 6 p strands spun it to make it ..it is called 6 ply. A common mistake to make is to assume that since , 6ply has 6 strands it will be thicker than say a 2ply. this is true only if the individual strand in the said 6 ply and 2 ply is the same. If the individual strand in the 6 ply is very fine then naturally the 6 ply will be thinner than a 2 ply that has much thicker strands spun in.

4 ply
4 ply

So that’s it…………. a basic gyan on Wool. I hope this has been helpful. Most of this information is from different blogs on the internet. The Craft Yarn Council, USA; Blogger Sara Duggan from the blog Crochet & Me…and many other sources. A Big Thank You to Each and Every One of You…….

Namaste……..and May this day be full of love and contentment for you…..

happy_dance

Know your Cotton Yarn/Thread/Hook

YARN GYAN- COTTON

DSC_4814

What is, an experienced Crocheter’s idea of Paradiso, could be a beginner’s nightmare….What yarn to use with which hook for a particular pattern????

Here I will try to introduce you to the basic varieties of yarn….As you already know or will discover , the available selection of yarn all over the world is too numerous and almost impossible to collate and present in one blog post. This is but a modest attempt on my part to make yarn selection easier for beginners to crochet.

Apart from natural fabrics like Cotton, Wool, Silk, commercial yarn can come in Polyster, Acrylic, Nylon, Viscos….and a mixture of natural and artificial yarns. However….crochet is such a flexible art form that you can crochet with  almost anything.

I have used Coir, Jute, Hemp and seen work done with plarn(ripping plastic bags into long strips, rolled into balls ), old bedsheets, T-shirts, dupattas, old sarees, skirts etc( that are also cut into strips and crocheted into mats, bags, etc). Recycling at it’s best.

Twine,cord, wash line cords, nylon ropes, any of these can be hooked into very useful and strong baskets, bags, pot holders.  Flexible metal wires….be it aluminium, copper, silver or gold………(used in making jewellery) make beautiful crocheted jewellery and table accessories.

So basically you can crochet with anything …Well Almost….:-))

This post is about mainly on Cotton yarn……but I have added a few pics of other crochet able materials.

COTTON

Cotton is one of the best of natural yarns that can used in tropical climates. Good quality cotton yarn is easy to maintain, wash and comfortable to use. In India…..we usually get Laura cotton, Anchor, Red rose ….and assorted other yarns.  Outside India…DMC has a lovely and large collection of cotton yarn.  So has the Korean yarn Soft Feather. Since I don’t know much about the cotton yarn available to the European and American Markets….I will leave my discussion to yarn that I have used.


Laura Cottton Hook 3.00mm , 3.5mm, 4.00mm
Laura Cottton
Hook 3.00mm , 3.5mm, 4.00mm
Bamboo...50% cotton and 50% viscose  Hook 3.00mm, 3.5mm, 4.00mm
Bamboo…50% cotton and 50% viscose
Hook 3.00mm, 3.5mm, 4.00mm
Bali Cotton Yarn Hook 3.00, 3.5mm, 4.00mm
Bali Cotton Yarn
Hook 3.00, 3.5mm, 4.00mm

What is the difference between yarn and thread?

Yarn usually comes in ply, and is usually thicker than thread…but there  is yarn esp in wool …..Nako Kristal being a good example…..that is almost as thin as thread.

Cotton Thread usually comes in numbers  starting from #10, #20, #30,#40,#50, #60,#70,#80, #100 Here the thread becomes thinner and finer as the numbers go higher. For Eg: #10 is thicker than # 20…#20 is thicker than #30 and so on.

#100 is super fine thread and used to crochet very delicate lace,edgings etc.  Numbers #30 and above are also used for tatting.

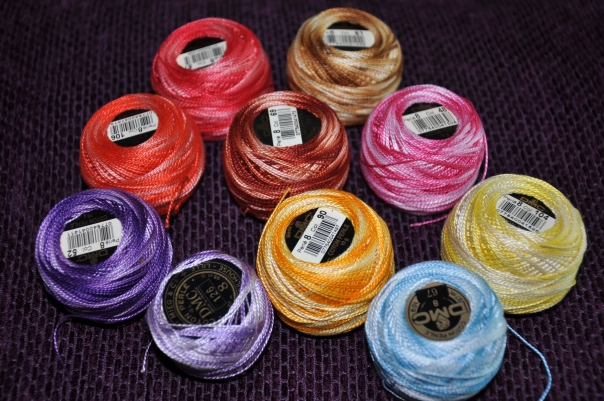
Apart from this we also have cotton thread Pearl. This kind of thread is numbered differently than that of mercerised cotton as mentioned above. here the thread is softer, glossier and looks almost like silk.  This type of thread comes in 3 numbers….#3, #5, #8

I am mentioning, the hook size to be used, with almost every yarn here…but it is to be treated as a guide and not as a rigid rule. Again you may want to crochet Loose…in which case you must choose a hook size larger than the ones mentioned against each yarn or  u may wish to crochet tight….where you will then  to reduce the hook size by a couple of notches….to get a closely stitched pattern.

Cotton Thread Pearl
#5 Pearl:  Makes great lacey scarves, vests, boleros, bags etc…Comes in 50 gm balls(Soft Feather)
#5 Pearl, Hooks 1.25mm, 1.5mm, 1.75mm
#8 Pearl:  

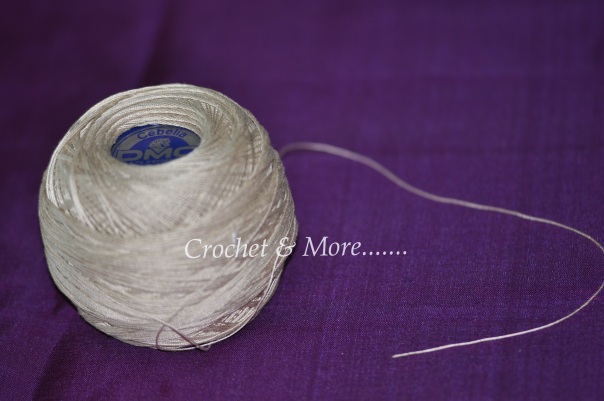
You can use hooks # 0.90mm, 0.95mm, 1.00mm,. This yarn is great to make Pretty little flowers, butterflies etc to accessorise apparel, home Decor etc,  perfect for  edgings, trimmings etc….comes in 10gm balls(DMC)

DMC #8 pearl variegated

#8 Pearl….Hooks #0.90mm, 0.95mm, 1.00mm

#3 Pearl: Excellent for garments.
#3 pearl Hooks suggested 1.5mm, 1.75mm, 2.00mm
Cotton Thread #40

Used widely in tatting and for fine pieces of lace and edgings, borders, trimmings, motifs, collars etc.

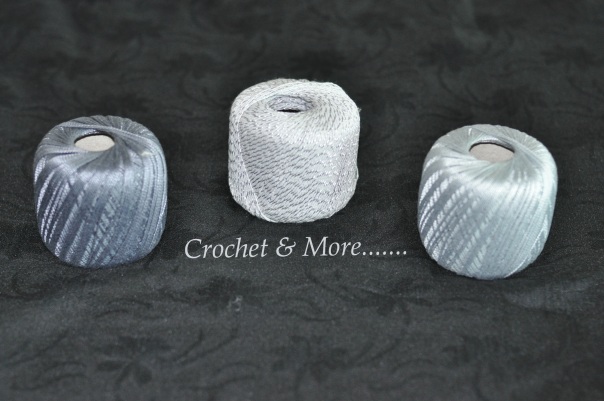
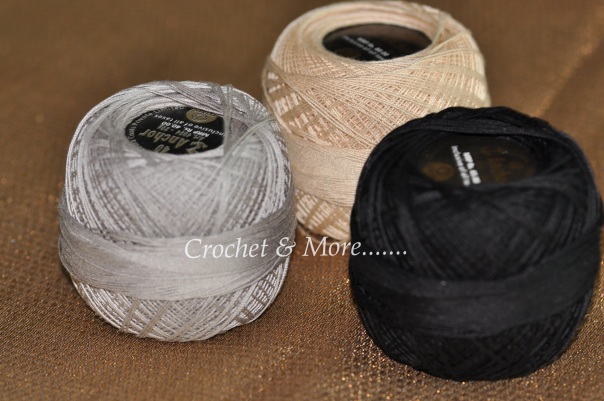
Ancor #40 Hook size 0.6mm,0.65mm,0.65mm,0.7mm
Cotton Thread #30:

Used widely in tatting and for fine pieces of lace and edgings, borders, trimmings, motifs, collars, Doilies,  etc.


#30....Hook size 0.75mm, 0.85mm, 0.90mm, 0. 95mm...
#30….Hook size 0.75mm, 0.85mm, 0.90mm, 0. 95mm…


DSC_7389


Cotton Thread #20: 

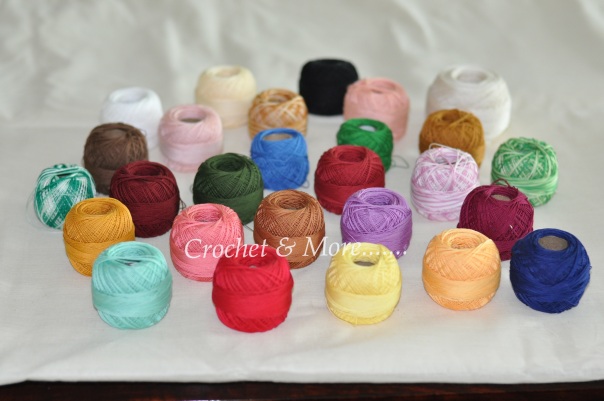
Hook sizes recommended are 0.90mm, 1.00mm, 1.1mm, 1.25mm This yarn can be used to hook doilies, and anything that needs  a lacey finish…I have made  garments(though it is not very soft), Amigurumi,  bags, purses( very pretty, but time consuming cos the yarn take time to hook up).In Anchor, this comes in 20gm balls and as you can see in the pic below….they come in a delicious palette of colors.

Anchor #20 Hook size 0.85mm, 0.90mm, 0.95mm, 1.00mm
Anchor #20
Hook size 0.85mm, 0.90mm, 0.95mm, 1.00mm
Cotton Thread #10

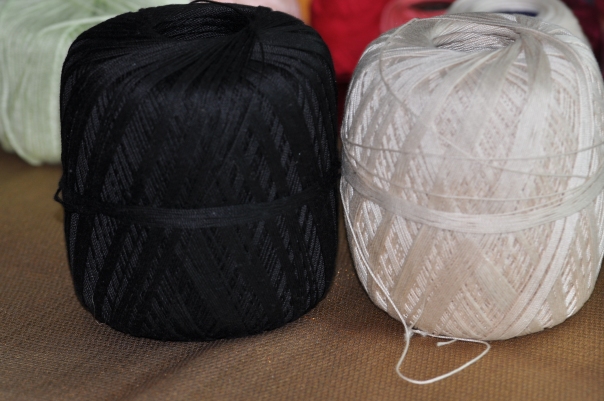
Hooks sizes 1.5mm, 1.75mm. Comes in balls of 100gms. Very versatile…can use this one to hook up almost anything.


DMC #10
DMC #10
Red Heart & DMC Slightly thicker than #10
Comparison of Cotton thread

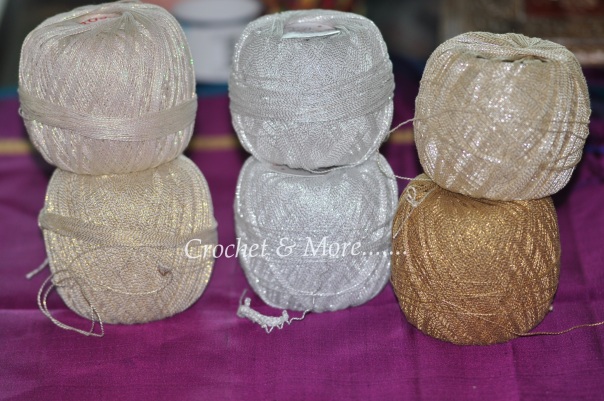
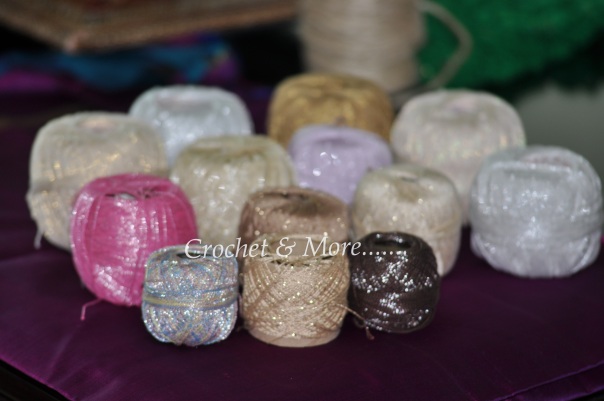
Metallic Threads

Hook size1.00mm,1.25mm


DSC_7370


 Cotton yarn

DSC_7216


Cotton yarn comes in various ply and thickness. I will introduce you to the yarn that I have used and know of…this will give you a broad idea of  what yarn to use. I will also indicate what hook to use with what yarn….This is not a hard and fast rule…..as you get more and more experienced, you will  develop your own comfort zone in choosing hooks to certain yarn.

DSC_7355


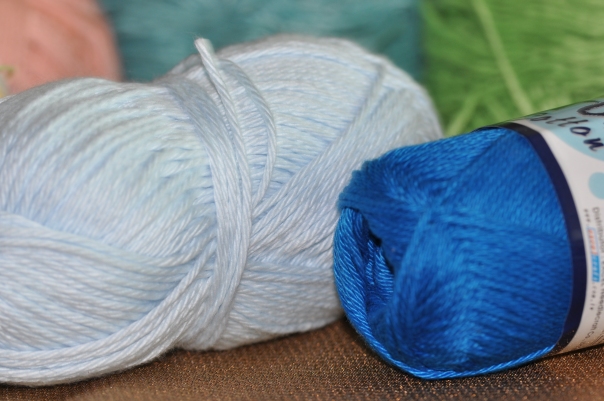
Hook size 3.00mm to 4.5mm
Bali Yarn 8 ply and 10 ply

Cotton yarn is thicker than cotton thread and most times much more softer…it is very good for making apparel, bags, baby clothes, dish cloth, blankets, anything that requires thick yarn…..and it works up very fast. yarn usually comes in ply.

What is Ply?

Ply simply means that when the yarn is spun it is spun by twisting 2/3/4/6/ 8/ etc strands of thread together…….For e.g.: if the yarn has two strands of thread spun in …it is called  2 ply. If it has 6 p strands spun it to make it ..it is called 6 ply. A common mistake to make is to assume that since , 6ply has 6 strands it will be thicker than say a 2ply. this is true only if the individual strand in the said 6 ply and 2 ply is the same. If the individual strand in the 6 ply is very fine then naturally the 6 ply will be thinner than a 2 ply that has  much thicker strands spun in.

Nylon thread ..good for bags and purses…..Hook 1.75mm, 2.00mm 2.5mm


Left one is 4 ply right one 10 ply

DSC_7377 DSC_7379 DSC_7385


DSC_7218


Knitting Cotton:

In India, we usually get knitting Yarn from Anchor, Laura And Red Rose. Of these Laura is the thickest and is to be hooked with a #3.00mm hook. Anchor is slightly thinner with a sheen to it….Can use 2.5mmm and red Rose is almost like #10 DMC Yarn…Use hook !.75 with this one.

Hook size 3.00mm to 4.00mm


Metallic knitting yarn hook size 3.00mm to 4.00mm


Other Natural fibres that can be hooked:

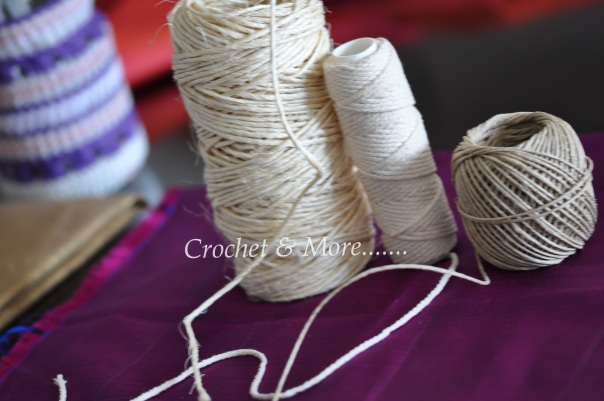
I can walk into any place and exclaim yarn…..recently I got what I called yarn and what Hubby darling exasperatedly called twine, cord etc…..I got these Hemp, Jute and natural fibres…….and I have great plans for these buddies…


I would use 3.000mm to 5mm on these


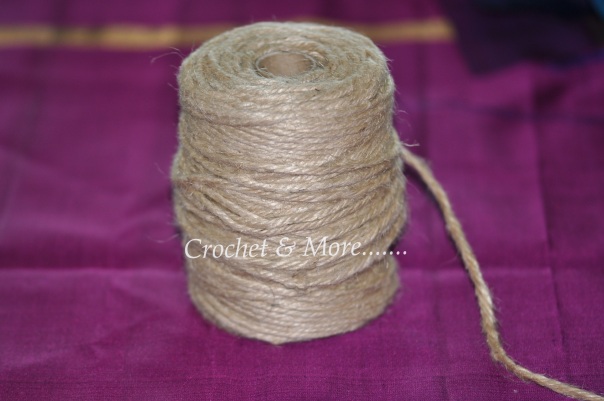
Jute....need at least an 8.00mm hook here
Jute….need at least an 8.00mm hook here

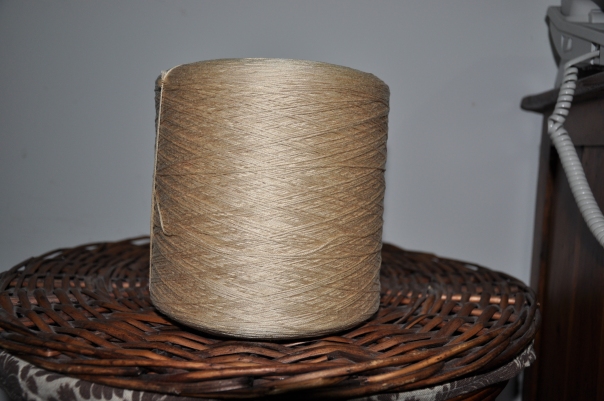
This is an unusual find…..this lovely beige cotton yarn is from India…it will be excellent for apparel….soft, with a lovely sheen to it and easy to hook.  Unfortunately only for export.

DSC_6887


OTHER CROCHETABLE STUFF(for the lack of a better word)


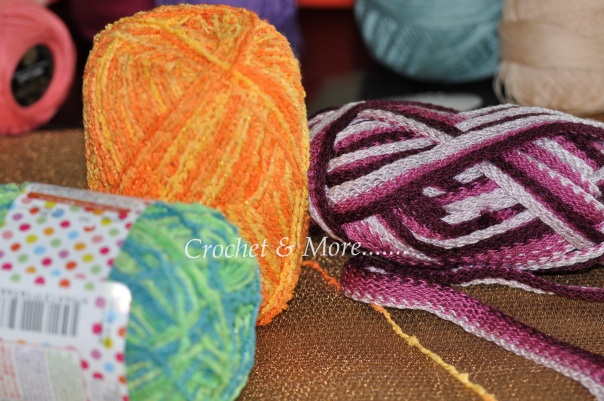
This fuzzy wozy yarn is great to be used in hooking scarves ad bags...
This fuzzy wozy yarn is great to be used in hooking scarves ad bags…

Hook size depends on the width here…I would use a 3.00mm for the orange and green yarn and a 4.00mm for the broader purple shaded one.

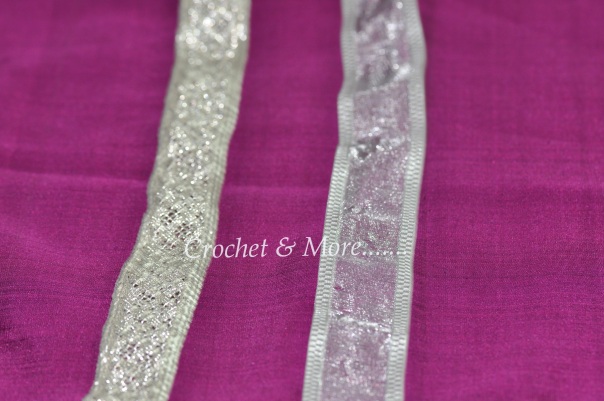
Below A Metallic Silver Georgette Ribbon….Use 8.00mm or above…..

Metallic ribbon, Georgette ribbon...use a 0 8mm and above for these


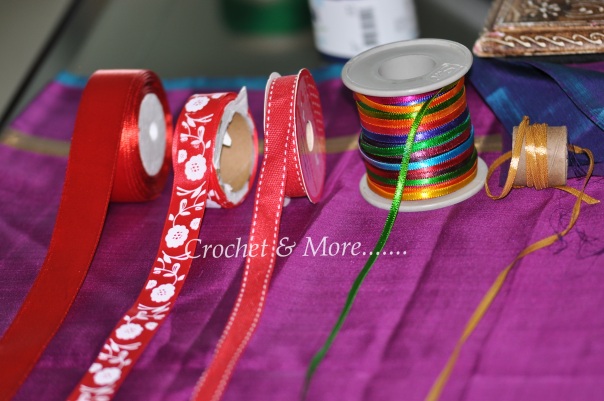
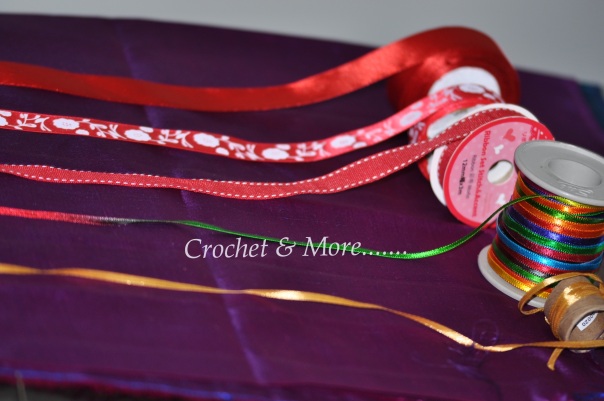
Satin ribbons of various width


DSC_7398


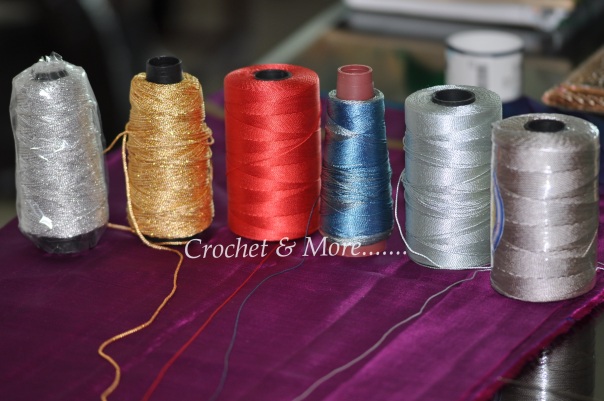
Purse Thread

Nylon thread ..good for bags and purses.....Hook 1.75mm, 2.00mm 2.5mm


DSC_7394


Malai Dori....great for bags....0.6mm and above
Malai Dori….great for bags….0.6mm and above


I do hope that you have found this post useful….do tell me what you think of this one…if you have information on cotton yarn, that you think can help  make this article more helpful….Pls do not hesitate to let me know. If you can share pictures with me that would be great….I will add them to this post and credit you for that info.

Adios Amigos..For Now…Until Next time…Huggggggs!!!!