How to fix a lining for a semi-circular Crochet Clutch

Usually when you are making a semi- circular clutch either in fabric, crochet, knitting or any other material…the easiest way to do this is by creating or cutting out a round shape of the size that you want your clutch to be and folding it, thus getting a semi -circle shape.
Please Note that this tutorial caters to both…those who are using a canvas within the lining to give shape to the Clutch and those who just want a fabric lining. While you must go through the entire tutorial….All notes in Blue are for those who are only doing the fabric lining.
Once you have worked your round shape in crochet…into the size you wish…

the next step is to fix the lining. Now linings can help in two ways
- To give the clutch a definite shape in case the crocheted round is not stiff
(if you have made it in acrylic or any other soft yarn, or have not used the Mochila method of carrying yarn thus giving strength and shape to your work)
2. To make the inside of your clutch look aestheically appealing and neat. You don’t want to be grappling with loose thread ends etc…becos the inside of your clutch will be your wrong side.
Now that you have finished your crochet work…..Lay it open on the table…if you need to starch it to make the shape hold or more stiff…do so now(this is if you are doing the work in thread)…but you don’t have to if you you have worked with a studier fibre.
I was at an exhibition in Pune recently and while conversing with a very talented crafter learnt that in India many ppl line their bags with jute material. Not only does it come cheap…it is also has an ethnic charm all of it’s own. It is also sturdy and doesn’t allow the finished work to flop about).
It is time to do the lining work…..
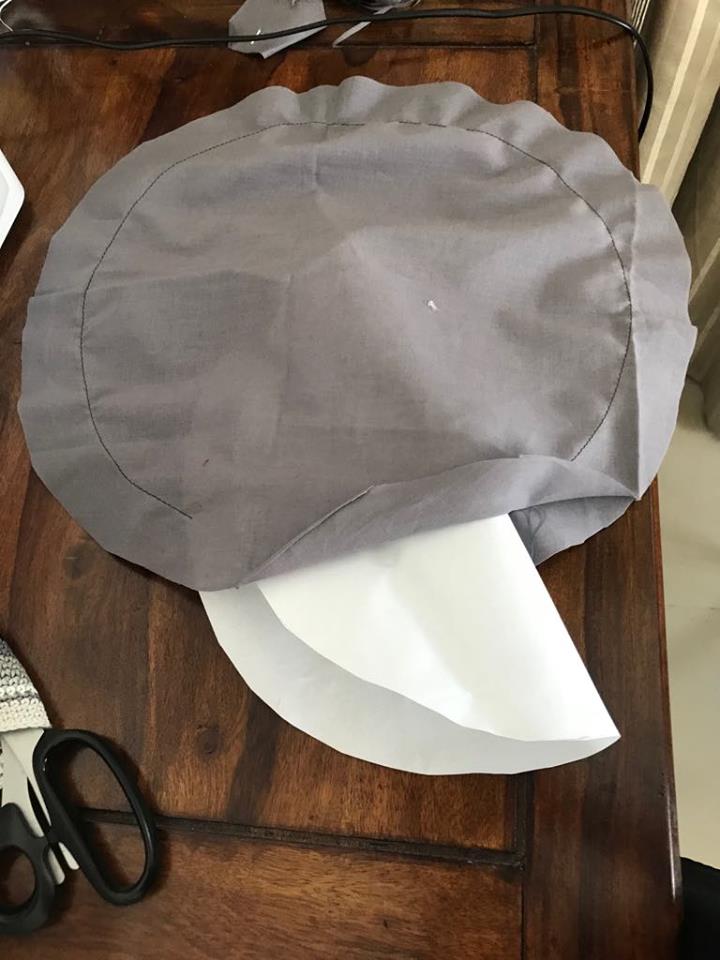
1. Fold the lining material in half. Place your crochet Round on the Lining material. There should be a 2 cms extra material around the crochet round. So that after you mark and cut the fabric you have 2 fabric rounds.
( Remember if you are using a fabric with patterns on it…it is important to fold the material in such a manner that the wrong sides are facing each other and that the right side, is facing you.
If you are not using a canvas material to give shape to the clutch,
There is no need to fold the fabric,
Mark another cirlce by pencil just 2 cms away from the first circle,
…. then cut out just one fabric round….
And sew around the hem to give it a neat appearance. You can either use a sewing machine or you can sew it in by hand using the running stitch.

2. Using a fabric chalk or a pencil….mark a circle exactly around the crochet round on the fabric.

3. Now mark another circle concentric to the first one, 1 cms away. And then the third and most outer concentric circle another 1 cms away. Thus you have now marked out 3 concentric circles. Like is seen below….

4. Now cut the fabric along the outer most circle. Keep aside.

5.Now if you have made the work in acrylic or any soft yarn..you will need a sturdy piece of canvas….Place the crochet Round on the canvas and measure a cirlce 1.5 cms less than that of the crochet round. Cut along this circle.


(We make the canvas round slightly smaller because, the edge of the crohcet round will be needed to join the sides and also to attach the zip.
(The pics below are optional….. I have used a plastic table mat too along with the canvas becos my canvas isn’t stiff enough)


6. Place both fabric rounds right side together ..


Using either a sewing machine or by hand (use running stitich) stitch together along the first concentric circle, around the two rounds but only work 3/4ths of the way. You have now created a round fabric envelope.


Push in the round canvas and make it lie straight within the fabric envelope that you have created…Hand stitch the rest of the round together. Then stitch around outline of the canvas in 2 circles slightly away form each other…This makes the canvas stay fit within the fabric envelope and is aestheticall appealing beocs the stitches will give the clutch a sharp edge when you fold it.

(The pics below are optional….. I have used a plastic table mat too along with the canvas becos my canvas isn’t stiff enough)


Once you have sewed the stiffening fabric(the canva) into the lining…fold it by half and pin it together all around the curve.
In the video below I explain the procedures to be followed –


Once you have pinned it sew inthe sides together to the length you think you need along the side. I have sewed in 10 cms on both sides, leaving the top portion open to fix the zip.


Here is another little video where how to fix the zip is explained….
Thus you have now done the lining for your clutch….
If you are not using a canvas you will fold and hem an edge around the fabric round,
Then, fold it and sew together both the sides.
you will sew in the zip as explained below
The next step is to fix the zip to the lining…
Place the zip across the top of the clutch.and fix the end of the zip, to the side of the fabric lining by sewing it in securely with a thick thread. Do not yet open the slider of the zip.

Once you have secured one end…..move the slider down the teeth of the zip so that you can place it on the excess fabric on either side of the mouth of the clutch.


Now sew in one side of the zip, say, the right side…when you reach the other side of the fabric lining move down until you reach to the closed edge. There you put both pieces of the zip together and sew it there securing the other end as well….


Then come back sewing along the left side securing the zip to the fabric edge. Once you have fixed the zip. close the zip.
Fold you Crochet round in two… Join the sides on either side using single crochet.

Now push in the zippered lining into this crochet envelope that you have just created.
(Same procedure for those of you who re doing only the fabric lining)


Then, pull the crochet fabric tighly over the lining covering it completely except the zipper portion.


Using a thick thread sew and secure the crochet round to the lining fabric within.


Voila…you Stylish Crochet Clutch is ready!
The inside of your clutch….I haven’t yet hemmed in the excess fabric…..so when I am done it will be really neat….I will upload another pic in when I do….Right now I have to hurry to finish a CAL and make another liing tutorial without a canvas…just a fabric lining….with a zip.


 (pic courtesy the internet)